iPanorama – Using Banners for Information.

This entry is part 8 of 8 in the series iPanorama

Adding a “Banner” to an iPanorama 360° may be useful for adding static information. It does not move when the actual image is panned.

Adding this code will create a banner. The settings can be tweaked to suit specific types of information, colors, etc.

Add the following to the “Custom CSS” field.

/* Start of Banner Custom CSS Code */
.ipnrm-scene-banner {
transition: all 0.5s;
transform: translate(0,-100%);
position: absolute;
top: 0;
left: 0;
right: 0;
padding: 15px 20px;
background: #808080;
}
.ipnrm-scene-banner.active {
transform: translate(0,0);
}

.ipnrm-scene-banner .title {
color: #FFFFFF;
line-height: 20px;
font-size: 18px;
font-family: arial;
font-weight: 600;
margin: 5px 0;
}

.ipnrm-scene-banner .altitude {
color: #FFFFFF;
/*text-align: right;*/
line-height: 20px;
font-size: 17px;
font-family: arial;
font-weight: 400;
margin: 5px 0;
}

.ipnrm-scene-banner .description {
color: #FFFFFF;
/*text-align: center;*/
line-height: 20px;
font-size: 16px;
font-family: arial;
font-weight: 200;
margin: 5px 0;
}
/* End of CSS banner code*/

Add the following into the “Custom JS” field.

/* Start of Banner Custom JS Code */
var instance = this,
$ = jQuery;
var $banner = $(‘<div>’).addClass(‘ipnrm-scene-banner’);
instance.$container.append($banner);
instance.$container.on(‘ipanorama:scene-before-load’, function(e, data) {
$banner.removeClass(‘active’);
});
instance.$container.on(‘ipanorama:scene-after-load’, function(e, data) {
var scene = data.scene;
if(!scene) return;
$banner.empty();
if(scene.cfg.userData) {
try {
var data = JSON.parse(scene.cfg.userData);
data.title && $(‘<div>’).append(data.title).addClass(‘title’).appendTo($banner);
data.altitude && $(‘<div>’).append(data.altitude).addClass(‘altitude’).appendTo($banner);
data.description && $(‘<div>’).append(data.description).addClass(‘description’).appendTo($banner);
$banner.addClass(‘active’);
} catch(ex) {}
}
});

/* End of JS banner code*/

Playing with Maps

I have been wanting to change the way I display the nature preserves where I volunteer. I was using an image with “hot spots” added. It works, but I sorta wanted to do more.

I found a plugin that helps to easily construct and customize Google Maps.

The basic, free, WP Go Maps plugin produced the following map.

Filter by
Public Access
  • No
  • Yes
Guided Tour Only
  • No
  • Yes

You can see it’s pretty limited. The pop up justs shows the coordinates of a location. Actually when you enter an address it will show the address in the popup. BUT, many of the pins need moved to actually sit on the parking lot, trail head, etc. and when you move the pin. . . it no longer knows the address so it puts the GPS coordinates in the pop up, Not so useful since you cannot tell which of the preserves you are looking at, or any information about them.

I am thinking about “going Pro” with the plugin so I can do a lot of other fancy customization’s. One PRO feature is also being able to provide directions to the preserve to the user. Will also sort a list by distance away, and other fun things! It’s not expensive, but need to think if it is something that I am really going to spend time on, and why.

I shall go and ponder this for awhile and come to a decision.

Flat picture with Video Introduction using iPanorama.

This entry is part 7 of 8 in the series iPanorama

The above window uses “Shortcode” to put on post.

The following window uses iframe settings to display. Both use the exact same iPanorama tour.

<iframe width="780" height="555" src="https://www.kasdorf.name/wordpress/ipanorama/virtualtour/23" frameborder="0" allowfullscreen=""></iframe>

For fun, I saw the code to add a movie “Splash Screen” at the beginning of the tour. I need a better video to use though, I just grabbed the first one I came to!

Either way works, but using iframe allows you to easily adjust the size of your window.

iPanorama Window Size Using “General” Settings.

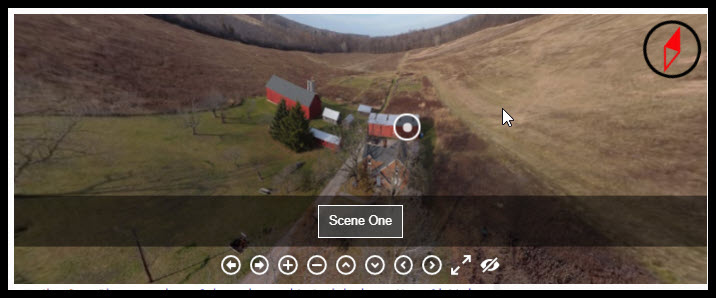
In a prior post I went through changing the size the 360 is displayed using the “Embed code with ID” settings. Some people may find it easier to use the “General” settings in iPanorama to set the desired size of the displayed image. Just insert the “Standard shortcode” and you are done.

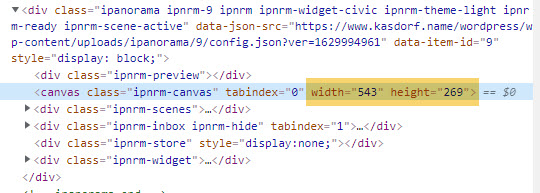
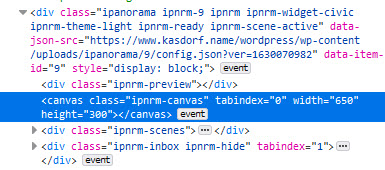
Leaving all settings at their defaults, and using the “Standard Shortcode” I get the following for my #9 iPanorama tour.

So, it appears that the “default” ends ups 543×269… why, I have no clue.

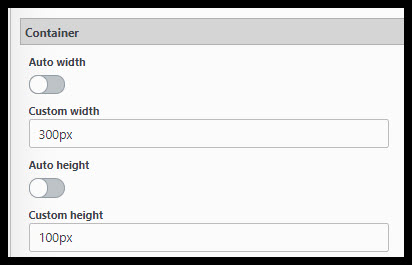
Note: You MUST add the units, in this case it is pixels, so make sure you put “px” after the number!! Or you will get really frustrated trying to figure out why it isn’t working!

Now, to experiment, in “General” settings, “Container”, Turn off Container “Auto width” and “Auto height”, then set them to another value. I used 300px by 100px here.

Not so useful at this size! Unless you just wanted people to see the controls!

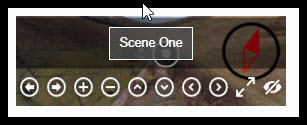
The actual image comes out at 269×89, maybe to preserve aspect ratios? Allow room for borders? Maybe padding? Again, I don’t know, but it does change the displayed image size. You can tweak the sizes to get closer to the actual display size you want.

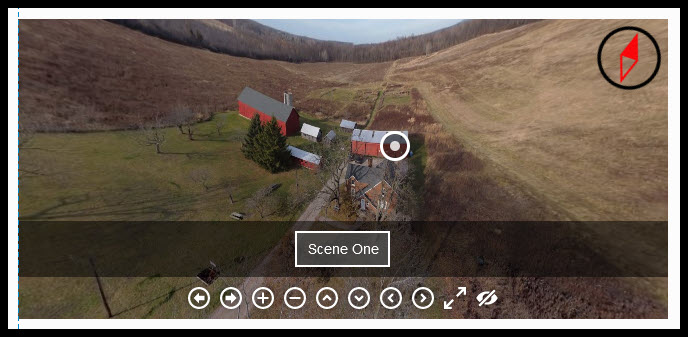
Changing the Container size, but only using the Width setting while leaving the height set to “Auto”.

Again, we can see it has changed size, to match the width entered into the Container settings. Not sure where the height comes from!

This is mostly to show that in fact these settings work, and how to make basic changes to them.

iPanorama Window Size Using Short Code

I see questions on the WordPress support size about changing the size of the window a tour is displayed in. Thought I would demo it, just for fun.

To do this I normally just use the “Short Code” section “Embed code with ID”.

I’m not sure, but you may want to leave the settings in “General” checked for “Auto height” and “Auto Width”, but this may over ride them anyway.

Default window size
Default General Settings for Window Size.

You can see this defaults to a window width of 560 pixels by 315 pixels. That makes the window look like this:

Inspecting the page shows that indeed it is a 560×315 size.

Changing the Embed shortcode to now be 760×215 we can see the effect on the display size.

Again, we can confirm the actual display size in comparison to the first window.

So, I think it is about that easy to set the initial display size.

iPanorama – Adding a Compass

Still playing around with the iPanorama plugin for Word Press. When reading about the features on the web site I noticed it said there was a compass to help keep you headed in the right direction!Since I do mostly 360°’s of nature preserves and trails, I thought a compass would be nice. I never could find out how to make it work, and so wrote in the support forum to see what was the secret!

Turns out, it was turned on in the program, one of those many little things that get missed during a major update. No problem, the author soon restored it, and I was off to the races!

It was nice, but I thought it lacking, at least for what I wanted.

Figure 1: The default compass

As you can see, it was quite small, and being black and white was not easily noticeable. While some people may like the fact that it is unobtrusive, it wasn’t for me.

I wrote the plugin author and asked about if, and how it could be changed. He replied promptly that yes it could be easily done in the “Custom CSS” section. Unfortunately as much as I wish I was able to program, I can’t.

He was very accommodating and sent me some sample code. I tried it, and it works so good! And while I can’t write original code, I can often hack up what is there to tweak it to my tastes.

So, if you have an interest, and want to add, or change the compass. Here are my hopefully simple directions.

Figure 2: iPanorama Compass activation and offset.
  • (1) In the scene you want a compass to appear in first make sure it is enabled.
  • (2) In the settings, turn the “Compass” slider on.
    • Note that you must do this for each scene in which you want the compass to appear.
  • (3) There is a field for “North offset”. Nothing to do now, but you may want to come back here later. If your compass does not point north correctly change the degree offset here.
    • Tip: clicking on the compass points it due North. If the image is not showing North at the top rotate the image so North is “Up” then note the current angle and estimate the degree change needed.
  • Save the tour, then if you use the preview button you should see the default small arrow. Where it appears depends on the widget (Theme) you are using. It should look like Figure 1 above.

But you don’t want that plain old compass do you! First you need a good compass image. Then to change the default to your custom image, copy this code into the “Custom CSS” window:

Figure 3: Custom CSS code

(4) Make sure you enable styles!

(5) enter or paste the code and modify the URL for your compass image.

.ipnrm .ipnrm-widget .ipnrm-compass:before {
display:none;
}
.ipnrm .ipnrm-widget .ipnrm-compass:after {
display:none;
}
.ipnrm .ipnrm-widget .ipnrm-compass.ipnrm-active {
width:64px;
height:64px;
background-image:url();
background-size:contain;
}
?
Figure 4: The custom compass

You can further tweak the size using the “width” and “height” parameters.

It looks okay on a mobile phone also!
iPad with widget – Note location of compass