iPanorama – Using Banners for Information.

This entry is part 8 of 8 in the series iPanorama

Adding a “Banner” to an iPanorama 360° may be useful for adding static information. It does not move when the actual image is panned.

Adding this code will create a banner. The settings can be tweaked to suit specific types of information, colors, etc.

Add the following to the “Custom CSS” field.

/* Start of Banner Custom CSS Code */
.ipnrm-scene-banner {
transition: all 0.5s;
transform: translate(0,-100%);
position: absolute;
top: 0;
left: 0;
right: 0;
padding: 15px 20px;
background: #808080;
}
.ipnrm-scene-banner.active {
transform: translate(0,0);
}

.ipnrm-scene-banner .title {
color: #FFFFFF;
line-height: 20px;
font-size: 18px;
font-family: arial;
font-weight: 600;
margin: 5px 0;
}

.ipnrm-scene-banner .altitude {
color: #FFFFFF;
/*text-align: right;*/
line-height: 20px;
font-size: 17px;
font-family: arial;
font-weight: 400;
margin: 5px 0;
}

.ipnrm-scene-banner .description {
color: #FFFFFF;
/*text-align: center;*/
line-height: 20px;
font-size: 16px;
font-family: arial;
font-weight: 200;
margin: 5px 0;
}
/* End of CSS banner code*/

Add the following into the “Custom JS” field.

/* Start of Banner Custom JS Code */
var instance = this,
$ = jQuery;
var $banner = $(‘<div>’).addClass(‘ipnrm-scene-banner’);
instance.$container.append($banner);
instance.$container.on(‘ipanorama:scene-before-load’, function(e, data) {
$banner.removeClass(‘active’);
});
instance.$container.on(‘ipanorama:scene-after-load’, function(e, data) {
var scene = data.scene;
if(!scene) return;
$banner.empty();
if(scene.cfg.userData) {
try {
var data = JSON.parse(scene.cfg.userData);
data.title && $(‘<div>’).append(data.title).addClass(‘title’).appendTo($banner);
data.altitude && $(‘<div>’).append(data.altitude).addClass(‘altitude’).appendTo($banner);
data.description && $(‘<div>’).append(data.description).addClass(‘description’).appendTo($banner);
$banner.addClass(‘active’);
} catch(ex) {}
}
});

/* End of JS banner code*/
Flat picture with Video Introduction using iPanorama.

This entry is part 7 of 8 in the series iPanorama

The above window uses “Shortcode” to put on post.

The following window uses iframe settings to display. Both use the exact same iPanorama tour.

<iframe width="780" height="555" src="https://www.kasdorf.name/wordpress/ipanorama/virtualtour/23" frameborder="0" allowfullscreen=""></iframe>

For fun, I saw the code to add a movie “Splash Screen” at the beginning of the tour. I need a better video to use though, I just grabbed the first one I came to!

Either way works, but using iframe allows you to easily adjust the size of your window.

Specify opening scene in iPanorama.

This entry is part 5 of 8 in the series iPanorama

Using iPanorama 360 to create virtual tours? Would you like to open a specific scene at times?

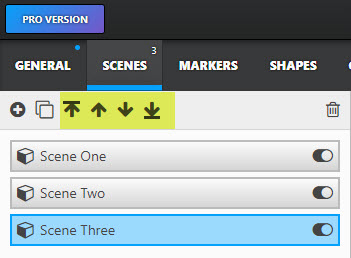
First, if you just want a specific scene to always open first, you can rearrange the scenes using the UP/Down arrows

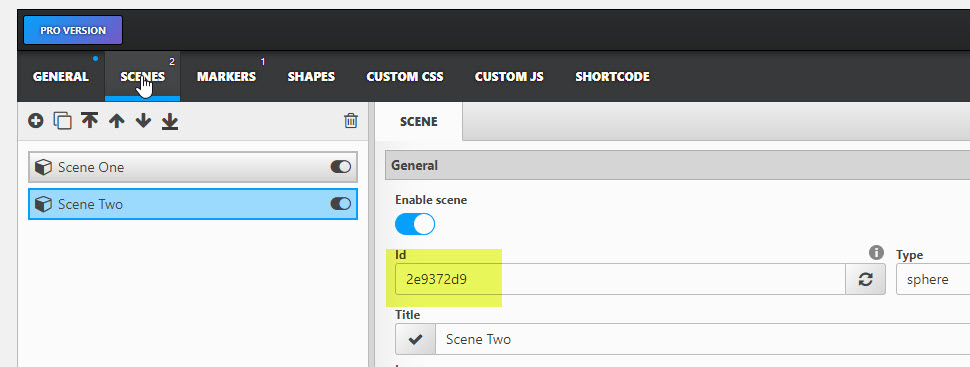
But if you just want to look at a specific scene for whatever reason you can use the short code with the sceneid. Note that each scene has a unique ID… yes it’s obvious, or you couldn’t specify the scene! Just watch which scene is highlit before you grad the Scene ID!

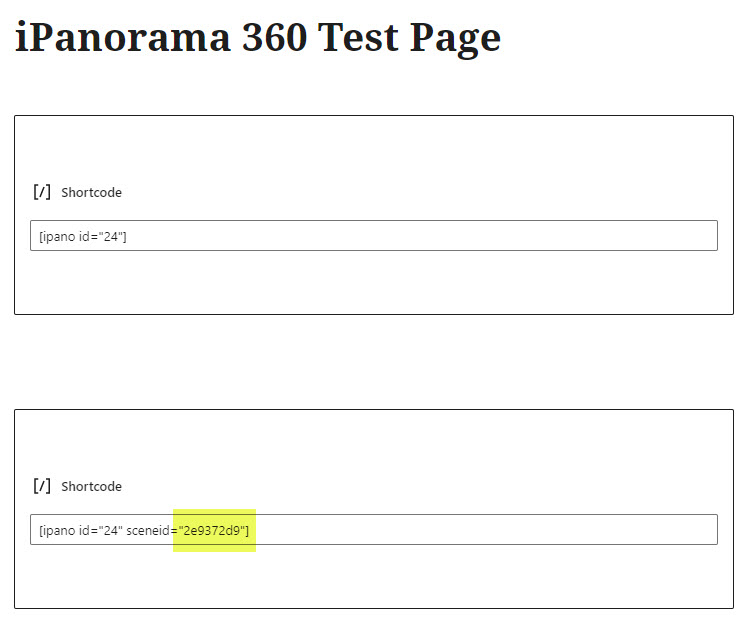
You should end up with the following.

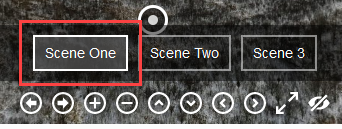
This one is the default opening scene #1.

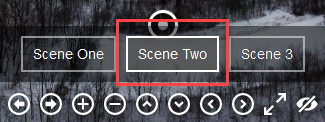
This one is using the custom sceneid, and you can see the “Scene 2” is highlighted, and different than the default.

I could see a use for this. One thing you could do is to create a page with buttons, then link each button to a different scene. While there are built in “widgets” with different styles, you may want to try and create something to match your web page.

I thought you should be able to use the iframe+URL+ID+SceneID but so far I cannot make this work! iframe width=”560″ height=”315″ src=”https://www.kasdorf.name/wordpress/ipanorama/virtualtour/test-after-upgrade-to-pro” sceneid=”2e9372d9″ frameborder=”0″ allowfullscreen></iframe

Creating a Border and Specific Window Size

This entry is part 4 of 8 in the series iPanorama

This is just to try and figure out how to add parameters for height and width. Also add a border.

iframe src=”https://smlc.news/ipanorama/virtualtour/test-after-upgrade-to-pro” allowfullscreen=”false” width=”560″ height=”360″ style=”border:21px solid black;”></iframe>

360 Pano Test using Short Code and Sceneid.

This entry is part 3 of 8 in the series iPanorama

First is a link using the default ipano id.

iPanorama-Shortcode-Scene-1

  You can use the same id, but append the Scene ID.

iPanorama-Shortcode-Scene-2

Using the shortcode for the tour (ipano id=”2″), appending the sceneid (for scene 2) above: ipano [id=”2″ sceneid=2e9372d9].

Note the small difference in the two scenes. In the first the Scene One button is highlighted, while in the second the Scene Two button is highlighted. (Highlit?)

<iframe width="560" height="315" src="https://www.kasdorf.name/wordpress/ipanorama/virtualtour/1?sceneid=f5120eec" frameborder="0" allowfullscreen=""></iframe>

iFrame Scene 1a

<iframe width="560" height="315" src="https://www.kasdorf.name/wordpress/ipanorama/virtualtour/1?sceneid=4d8f28b9" frameborder="0" allowfullscreen=""></iframe>

iFrame Scene 2a

Shortcode only Scene 1b

Shortcode only Scene 2b