Mantis Chipmate Info

A question was asked about the capacitor to start the motor. I pulled the cover off mine, which wasn’t as easy as I thought.

There are only three small Phillips head screws, which normally would not be an issue. However the units are stored in an outdoor shed. Seems like the wasps like to find small holes to fill with mud to make “nests”. I had to loosen all the mud, then scratch around in the screw slots to get the mud out of them so the screwdriver would get down into them and actually grip enough to turn them! I did get them cleaned and removed.

Mantis Chipmate Capacitor info.

I took a few pictures of the capacitor and put everything back together.

Hope this helps!

Mantis Chipmate

The Mantis Chipmate. Some information for the remaining three people that have one, or are just otherwise interested.
Some photos of the accessories.
I am not sure why, but I found these interesting and when researching the web for more information I found very little available.
I was lucky enough to uncover some original accessories, still (mostly) in the original packaging!

I actually have not used this machine very much. The little I did it seemed like you need to have some time on your hands to process very much through it!
Will try more later. It may also be that “green” clippings feed in easier than the dried out stuff I put in. It did chew them up into shavings, but took a little while.

Note: There is no “feed” system other than the push paddle, so you cannot just stick the end of a small branch in and have it pulled into the cutters and ground up. It must be constantly pushed into the chipper head.

Uploading Custom POI files to a Garmin GPS Unit.

In the first part of this two part series I wrote about creating a new POI file using ITN Converter and saving it so you may upload it into your GPS unit.

So, are you ready to proceed?

If you did not install the Garmin POI loader software when you got your unit, go and download it, then install it on your PC.
https://www8.garmin.com/products/poiloader/

Use the link to download. This page also mentions “Proximity Alerts” which you will need to set later when you are uploading your files to the GPS unit.

Uploading a custom POI file to a Garmin.GPS.

Now that you have the “POI Loader” installed you are ready to go. Get your GPS unit, plug it into your computer using a USB cable. When it is attached turn the GPS on. After a short time the the Garmin screen should show something like the following picture.
Uploading a custom POI file to a Garmin.GPS.

Now open the Garmin POI Loader software using your new desktop icon.
Uploading a custom POI file to a Garmin.GPS.

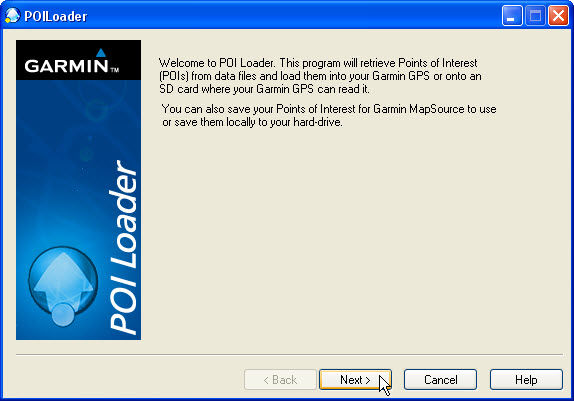
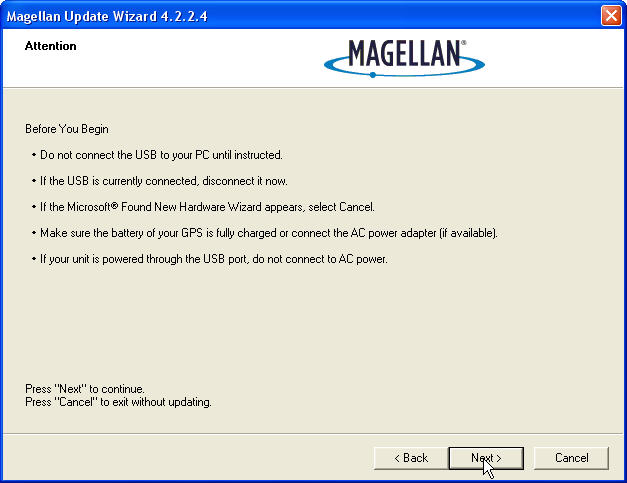
The software should open up, read what it has to say and then click “Next”.
Uploading a custom POI file to a Garmin.GPS.

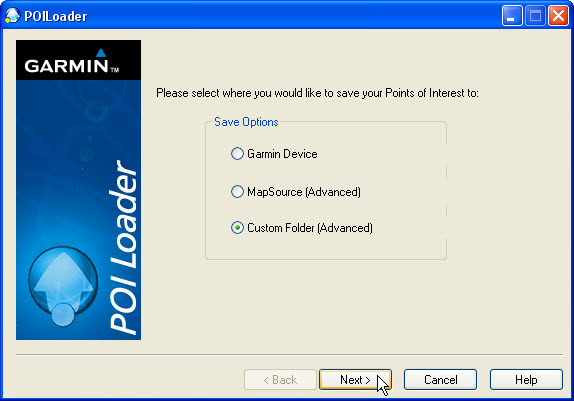
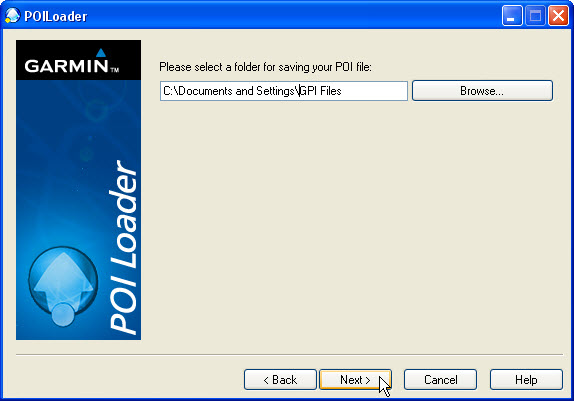
The next screen asks where you want to save your POI file to. Until you learn more about this, leave the default “Garmin Device” radio button selected. If is does not happen to be selected, do so, then click “Next”.
Uploading a custom POI file to a Garmin.GPS.

If you have the Garmin plugged in properly, and it is turned on, the program should automatically find your device. You can click on the button (15) but should not have to do so. Either way, make sure it shows in the window before you proceed. Once it does, click “Next” (17).
Uploading a custom POI file to a Garmin.GPS.

In the next window you can clear the old POI’s from the unit (perhaps you have some you no longer want. If you are just adding new POI files, or overwriting your existing ones, then just leave “Linstall new customer POI’s onto your device” radio button selected. Then click on “Next”.
Uploading a custom POI file to a Garmin.GPS.

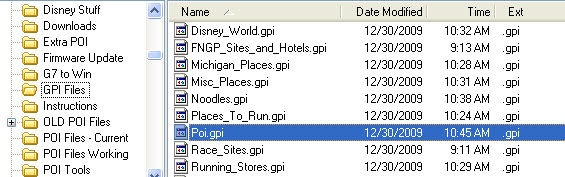
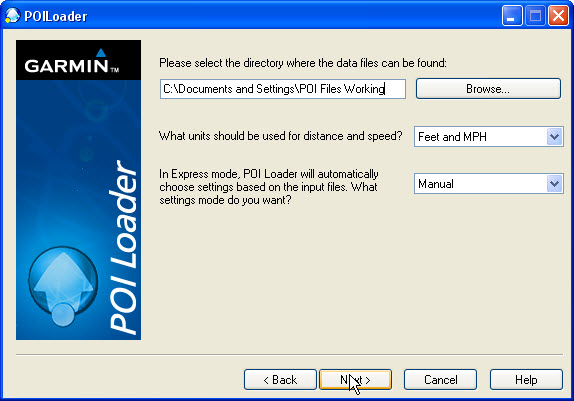
The next window requires some minor decisions to be made by you. Where is/are the POI files located at on your system. You do remember where you saved them from the first post when we created them… browse to that folder. (18)
Uploading a custom POI file to a Garmin.GPS.

TIP: If you begin making multiple POI files create separate folders for the “Current” and “Old” files.

TIP: If you begin making multiple POI files, or editing them and like to save the old versions as I do, then create separate folders for the “Current” and “Old” files. When you start to upload you will find it makes things much easier to select the files you want to use.
Pick your units of measure that you use. (19) and finally select whether you want the software to automatically upload everything, or if you want to do it manually. Select “Manual”! (20) I am pretty sure you won’t like the defaults on the automatic setting. Finally, click on “Next”. (21)
Uploading a custom POI file to a Garmin.GPS.

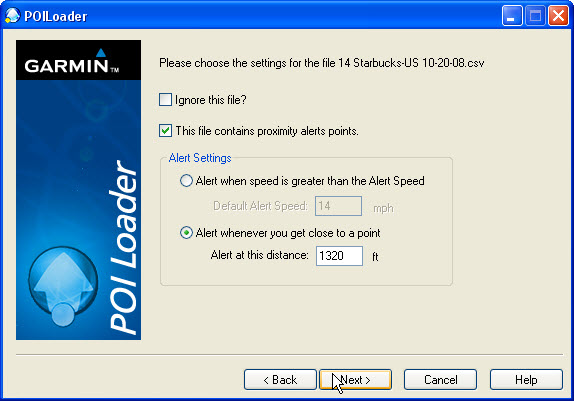
Once you click “Next” it will start preparing the files to upload. For every file it finds in the directory you selected it will ask what you wish to do with that file. (22) (This is why only having the current files in the directory is handy, you don’t have to skip all the files you do not want loaded.)
You can “Ignore the file” and go to the next one in the directory you selected. You can decide if you want “proximity alerts” for the file or not. (23) Basically these notify you when you are in range of any of the specific points contained in the file you are opening at the time. The “Alert when speed is greater than the Alert Speed” setting could be used to warn you to slow down when you are nearing your intended destination so you do not go past it, or maybe if you have “speed traps” programmed in it will just pop up a warning when you are in the vicinity of the programed locations. In that case a red box pops up on the GPS warning you that you are exceeding the speed you have selected. I like the “Alert whenever you get close to a point, and go with the default quarter mile (1320 feet). You might also like a half mile or some other distance. If so just enter it here and make sure you select the associated radio button. Once you have made your choices, click on “Next”. (24)
Uploading a custom POI file to a Garmin.GPS.

Once you have selected and configured the final file in the directory the software automatically goes to work. It converts the files to the correct format and loads them all into the GPS unit. This only takes a few seconds normally. Unless maybe you have some extremely large files. I have a total of almost 15,000 points I load and it goes quite rapidly. Once the “Congratulations” screen pops up you are done! Click “Finish (25) and then detach your GPS from the USB cable and go for a drive!
Uploading a custom POI file to a Garmin.GPS.

Now that you have added all your favorite POI’s you need to know how to find them on the unit! Since I had been using a Magellan unit for some time prior to getting the Garmin it took a few tries to get to them the first time. Once you do it though it is easy enough in the future.
When the unit starts up, you get the main screen. Click on “Where To?”.
Uploading a custom POI file to a Garmin.GPS.

On the next screen go to “Extras”
Uploading a custom POI file to a Garmin.GPS.

On the next screen go to “Custom POI’s” (Go figure…)
Uploading a custom POI file to a Garmin.GPS.

Finally if you have multiple Custom POI’s you will be given a choice of them. Here is why adding the number to the beginning of the file name helps to put the frequently used files at the top of the list.
Uploading a custom POI file to a Garmin.GPS.

Now that you have the file loaded you can pick the location you want to navigate to from the list.
Uploading a custom POI file to a Garmin.GPS.

Verify this is the location you want to navigate to and hit “GO”!
Uploading a custom POI file to a Garmin.GPS.

And as soon as it calculates everything you are on your way!
Uploading a custom POI file to a<br /> Garmin.GPS.

Until the final way point is added,
George

An easier method of updating Garmin Custom POI files.

After I found a few early attempts to make custom POI files to be both entertaining and useful I have been experimenting with other GPS projects.

The latest is figuring out the best method to actually put these POI files into the GPS unit.

As the collection of custom POI files grew the aggravation of loading them into the unit also rapidly increased. I felt there must be a better method of updating and uploading these to the Garmin unit.

A little background on how POI files work. ??????? ???? ???? ????? *Disclaimer* I am no expert on Garmin (or any other GPS) units or the software. I just have experimented with them and this is what I found in practice or researching on the web.

It seems the way the POI file works, if you use the Garmin POI loader anyway, is that it takes the directory of POI files you specify, then goes through the list and presents each one to you. You make the selections as you go (see earlier posts on this.) and when each file has been reviewed it compiles your selections into one POI file called “POI.GPI” and uploads it to the GPS unit overwriting the existing single POI file. The upshot of this is you must add every file making every selection (ignore, alerts, distance, etc) every time for every file. If you do not do so it does not add that POI file to the compiled file to upload. Then when you go to your new “Custom POI” files in the unit you cannot find them. If you are adding or updating any one of your custom POI files having to re list every one of your “sub files = .cvs file” can get tiresome very quickly. So I started looking for a way to get around this by hopefully being able to update single POI files.

*GPI is “Garmin Points (of) Interest”.

After a few false starts it seems the best way to accomplish this is to create individual POI.GPI files still using the Garmin POI Loader software…. just making a different selection and then uploading the resulting files (Note the plural “files” here…) manually…. which is what I am going to show you in the remainder of this post. The Garmin unit when turned on will find all “GPI” files located on the unit whether they are on built in memory, or on an SD card in the slot. This actually caused me some confusion for awhile, see more on this in the next post.

So… let’s get started.
First, you do have the Garmin POI Loader software installed, correct? If not go to the Garmin web site, download the software, install it and return to this page.

Here is the download page on the Garmin site.
…. taps fingers…. whistles a short tune…. plays five games of solitaire…. OH, welcome back.
NOW let’s get started.
Open the POI Loader.
Start the selection.

Start the selection.

Click on the “Next” button.

Start the selection.

Click on “Custom” Folder (Advanced). ????? ??? ???? ????? See you are already an advanced user after only a few minutes of reading this article.

Now click on “Next”.

Oh wait… let’s take a slight detour…you might want to create a new directory to put the individual GPI files you are about to create into… just to keep some order to things here. I created a “GPI Files” directory for this purpose.

Start the selection.

Now select the new folder using this screen.

Start the selection.

Now you do the same thing, except this is where your custom “cvs” files are being kept.

Again, you may wish to create a new blank directory and move only the files you want to work with into it. Remember the loader is going to ask you information on every cvs file in this directory. You may find it easier and quicker to move one or only a few files into this directory from your “Master” directory especially if you have a lot of .cvs files.

In this screen you definitely want to select “Manual” or it will process everything in the directory you specify thus defeating the entire purpose of this guide.

When you are ready, click on “Next”.

Start the selection.

When you click on next it presents the selections you can make. These selections are not that complex, but actually do create different types of files…. “alerts”, “red light warnings”, “speed alerts”, “Tour Guides” and so on which are beyond the scope of this post. If you do not know what they do, for now you can just deselect both of the check boxs. UNLESS you have multiple .cvs files in the directory you specified. Then you want to select the “Ignore this file? for everything except the first file in your list… then when you cycle through this process to create your next gpi file you will “ignore” the first file, use the second the ignore the rest of the files. All this depends on how many files are in your directory. Bottom line is that during each “pass” through this procedure you only select one file each time.

Start the selection.

After you use the first .cvs file presented “ignore” all the rest of the files you are asked about.

Start the selection.

When you get to the final .cvs file it will automatically create the new POI.GPI file where you specificed earlier.

Now, and this is important, you must rename the “Poi.gpi” file to something else. I give it the name of what types of locations are in the file….. if you do not do this when you go through the steps above to create your next gpi file it will just overwrite the existing Poi.gpi file with the information from the selected .cvs file. It will automatically create the Poi.gpi file you do not have to copy and rename it.

Start the selection.

Continue through the steps above until you have turned all your xxx.cvs files into an equivalent xxx.gpi file. You should have a directory full of .gpi files like shown above…. of course yours probably will have different names!

Creating a Custom POI file for Garmin GPS

I travel quite a bit for work, and find using a GPS to get me to all the different places I need to go is almost a necessity. There are also vacations with many places that we have never been to before. The days of carrying state maps in the glove compartment (Dating myself – but can you remember when you could get all the maps you wanted free at any gas station?) or an atlas in the trunk are over for me. Even the “high tech” method of using a mapping program to find a location, develop the route to the destination and then printing a map out are past their prime.

To get around to all these places with the least fuss I create different custom POI files for the Garmin Nuvi 755T that I received as a present. I would imagine the method I am going to detail on creating and uploading a custom POI file would apply to other models also.

First you need five things:

  • A Garmin GPS
  • Garmin POI loader software
  • A USB cable
  • ITN Converter software
  • An internet connection to download and use the ITN software.

First download the ITN software from https://benichougps.blogspot.com/
(Note: Clicking on any of the following pictures will enlarge (most of) them to allow you to see detail better.

Creating a custom POI file for a Garmin.GPS.

You may do better if you convert the page to English, although it is not really necessary.
Creating a custom POI file for a Garmin.GPS.

Click on the “Downloads” hyperlink.
Creating a custom POI file for a Garmin.GPS.

Follow the prompts to install the software to your PC. Once done you will have an icon like the following on your desktop.
Creating a custom POI file for a Garmin.GPS.

Once it is installed click on the icon to open the software. Then click on the “Editor” button in the lower right hand side.
Creating a custom POI file for a Garmin.GPS.

It will launch the program and open a link which displays Google Maps in a pane along with the program.
Creating a custom POI file for a Garmin.GPS.

Now the fun part starts! Where do you want to go?

Now the fun part starts! Where do you want to go? Type in a search string that gives you the results you want. (1) It can be an address or the name of a place. Here I wanted to find “Cobo Hall” in downtown Detroit Michigan since I was going to run a 10K “Turkey Trot” race there. Click the “Search Icon” (2). Now you have to pick the best match for where you want to go. I like to turn on the satellite view, (4) and zoom in so I can see the object fairly well. (5)

Creating a custom POI file for a Garmin.GPS. It may take a littel sleuthing to make sure you have the correct location. You can use the address that comes up and Google it to verify the address is the place you want. I often go to the Google Maps page and search there since it gives more detail on the place located. Once you are sure you have the correct location showing you can edit the name. (6) This name will later show in your GPS so you want it short and meaningful to you. Once you edit the name click on “OK”, then remember to click on “Add to itinerary” to save it to your list. (8)

TIP: You can click on the map to add a “pin” for the exact location you want.

TIP: You can click on the map to add a “pin” for the exact location you want. I like to do this so I can define a specific place I want to go such as a certain parking lot at a large park, or even the entrance or exit of a large building that I want to be closest to. Just add the pin then name it like above.

You should see it appear in your list of saved places (9)
In the file give your new file a name. (10) This name will later show in your GPS as the “Custom POI” file name. Again, you will want to give it a meaningful name.
Creating a custom POI file for a Garmin.GPS.

TIP:Organize your files!

TIP: I start all my file names with a series of numbers like 01, 02, 03, etc. This is because later the GPS will order the custom POI files in your GPS in this same order. I like to put the most commonly used ones first in the list to avoid a little bit of scrolling. You can always change the numbers later to add a file or rearrange them if you like.
Creating a custom POI file for a Garmin.GPS.

Repeat the above steps until you have as many waypoints as you want in your file. You can always come back and add more later if you want.
Once you have added all the points you want in this file, click on the X to close the editor.
Creating a custom POI file for a Garmin.GPS.

Once you close the editor it will automatically add the new locations to the file page.
Creating a custom POI file for a Garmin.GPS.
Now you are ready to save your file for later use. At the bottom of the window select “CVS” as a file type. (12) Then click on “Export”. (13)

When you click on export a file explorer opens, pick where you want to save your file, and the name you want it saved by. It will use the name you entered earlier by default but you can change it here if you like. Here I have added the “16” to the file name for later ordering of the files. Another tip is to use either the number of places contained in the file, or the date… or both as shown here. The number of entries in the file lets me know which “revision” it is if I edit the same file multiple times in a day.

That’s all there is to creating your first custom POI file! The ITN software makes this so easy to do I frequently go back in an add even one or two points to a given file. It’s easier than typing in an address in the GPS unit, and probably more accurate.

Now that you have a file what do you do with it? Come back in a week when I go through the details of how to best load the new custom POI’s into your unit.

Until the final POI is defined,
George

Upgrade your Magellan Maestro 3250 GPS Firmware, a How-To.

Upgrading a Magellan Maestro GPS Firmware – Install Firmware

Before you attempt this step you should have completed the directions in the prior post to download the latest firmware for your unit off the Magellan web site.

Magellan Maestro 3250 GPS Unit

When you completed the final step in obtaining the firmware upgrade (shown above) it was saved to your PC hard drive…. you remembered where…. didn’t you?

My Firefox download manager is set up to save downloads to the desktop where I can see them easily.

Magellan Maestro 3250 GPS Unit

After it completes the download, you should have the file… here is the icon on my workspace/desktop.

Magellan Maestro 3250 GPS Unit

You may want to create a directory to put the extracted files, so create it first, but since there are only two files, if you want to extract them directly to the desktop it isn’t a big deal. You can just delete the later, or save them to another place, but I doubt if you would ever need them again.

It is a self extracting .Zip file, so if you “double click” on the icon, it should begin the extraction process.

Magellan Maestro 3250 GPS Unit

Once it unzips it will start the install process.

Do NOT have your unit plugged into the USB cable at this time! I think if you do, not only will it trash your GPS, it will reformat your hard drive.

Do NOT have your unit plugged into the USB cable at this time! I think if you do, not only will it trash your GPS, it will reformat your hard drive. Set your VCR time ahead two hours, turn the temperature up in your refrigerator so your beer is warm, it will also cause gas prices to go above $5 a gallon and melt the polar ice cap…. and you do NOT want to be responsible for all that! Leave the GPS unplugged!! Until it says to plug it in.

The defaults should be okay to leave as they are, so just click on “Next”.

Magellan Maestro 3250 GPS Unit

Magellan Maestro 3250 GPS Unit

When you get this screen it is okay to plug in!

Read carefully and take heed.

  • Make sure the unit is fully charged
  • Make sure it is turned on, and all the screens have opened so you are at a “street View.

Then, and only then, click on the Next Button.

Continue reading