Category Archives: iPanorama
iPanorama Add a NADIR or ZENITH Logo
Easy enough to add.
Create your tour.
Create your Scene
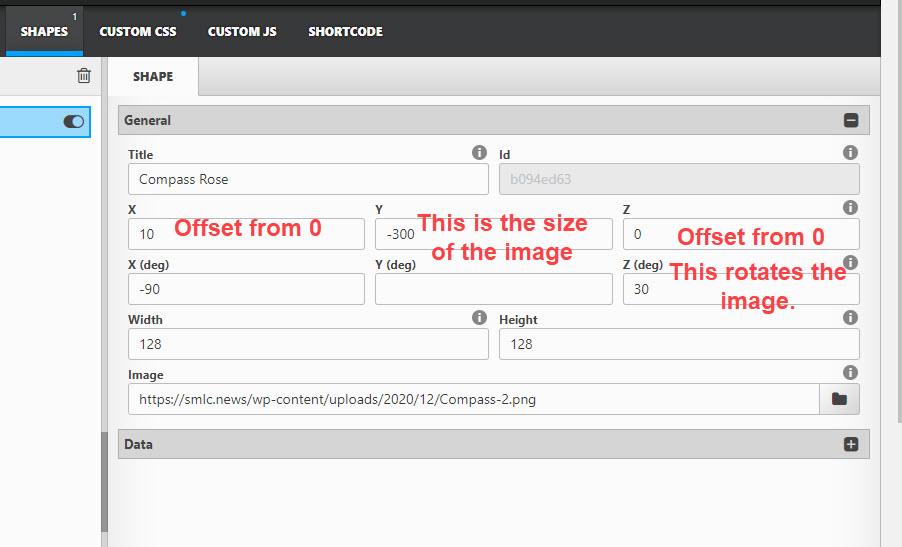
In your Scene create a SHAPE.

NOTE: If you zoom in on the photo you should see handles that will allow you to directly drag the logo around where you would like it placed.
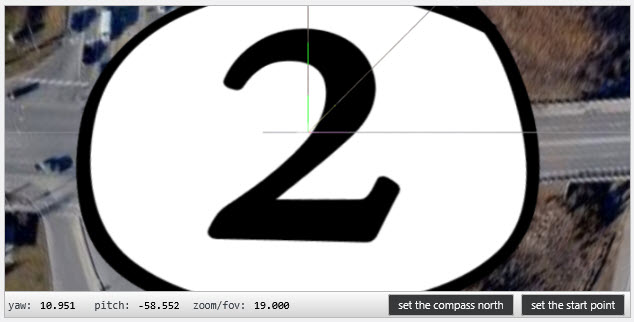

You will have to do this for each scene.
It should end up like this.
Have fun!
iPanorama Cube Image Format Test

It looks like this when previewed in the WP Editor.
Using a Cube image in iPanorama. Seems several issues may come in. While not intuitive, there are 2 “cube” types in the iPanorama drop down. Try them both, but this one use the

Started with this image.

Use the ‘Type cue (1 texture) option.

iPanorama – Using Banners for Information.
Adding a “Banner” to an iPanorama 360° may be useful for adding static information. It does not move when the actual image is panned.
Adding this code will create a banner. The settings can be tweaked to suit specific types of information, colors, etc.
Add the following to the “Custom CSS” field.
/* Start of Banner Custom CSS Code */
.ipnrm-scene-banner {
transition: all 0.5s;
transform: translate(0,-100%);
position: absolute;
top: 0;
left: 0;
right: 0;
padding: 15px 20px;
background: #808080;
}
.ipnrm-scene-banner.active {
transform: translate(0,0);
}
.ipnrm-scene-banner .title {
color: #FFFFFF;
line-height: 20px;
font-size: 18px;
font-family: arial;
font-weight: 600;
margin: 5px 0;
}
.ipnrm-scene-banner .altitude {
color: #FFFFFF;
/*text-align: right;*/
line-height: 20px;
font-size: 17px;
font-family: arial;
font-weight: 400;
margin: 5px 0;
}
.ipnrm-scene-banner .description {
color: #FFFFFF;
/*text-align: center;*/
line-height: 20px;
font-size: 16px;
font-family: arial;
font-weight: 200;
margin: 5px 0;
}
/* End of CSS banner code*/
Add the following into the “Custom JS” field.
/* Start of Banner Custom JS Code */
var instance = this,
$ = jQuery;
var $banner = $(‘<div>’).addClass(‘ipnrm-scene-banner’);
instance.$container.append($banner);
instance.$container.on(‘ipanorama:scene-before-load’, function(e, data) {
$banner.removeClass(‘active’);
});
instance.$container.on(‘ipanorama:scene-after-load’, function(e, data) {
var scene = data.scene;
if(!scene) return;
$banner.empty();
if(scene.cfg.userData) {
try {
var data = JSON.parse(scene.cfg.userData);
data.title && $(‘<div>’).append(data.title).addClass(‘title’).appendTo($banner);
data.altitude && $(‘<div>’).append(data.altitude).addClass(‘altitude’).appendTo($banner);
data.description && $(‘<div>’).append(data.description).addClass(‘description’).appendTo($banner);
$banner.addClass(‘active’);
} catch(ex) {}
}
});
/* End of JS banner code*/
Flat picture with Video Introduction using iPanorama.
The above window uses “Shortcode” to put on post.
The following window uses iframe settings to display. Both use the exact same iPanorama tour.
<iframe width="780" height="555" src="https://www.kasdorf.name/wordpress/ipanorama/virtualtour/23" frameborder="0" allowfullscreen=""></iframe>For fun, I saw the code to add a movie “Splash Screen” at the beginning of the tour. I need a better video to use though, I just grabbed the first one I came to!
Either way works, but using iframe allows you to easily adjust the size of your window.
Quick Steps to add ToolTips to iPanorama.
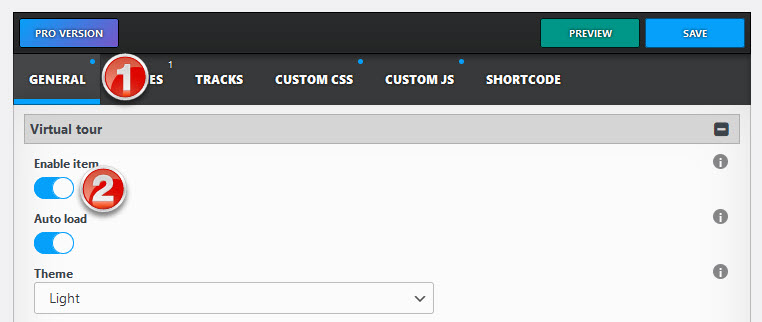
Open iPanorama 360 Project
In “General” (1) make sure “Enable” (2) is selected.
Select “SCENES” (3) Select the specific scene you want to work in. (If you have multiple.) (4) Make sure it is enabled (5). This assumes you have already made at least one scene at this point.

Go to “Markers” (6) (either add a new Marker, or make sure you actually select an existing marker (7) in the left pane. It will be blue if selected.
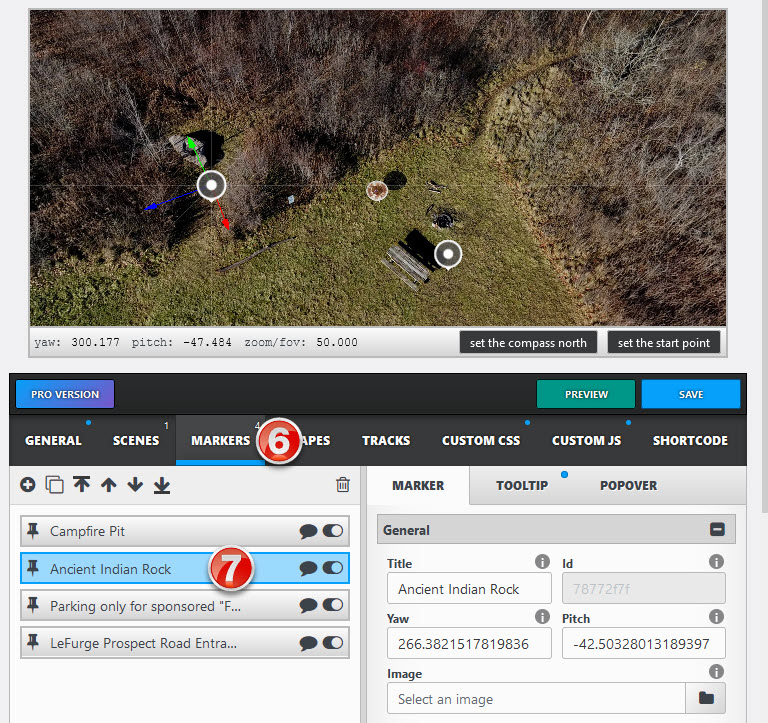
When you add the Marker, an icon will appear in the preview. Move it around with the mouse to where you want your ToolTip to show up.

Above the right pane you should see the “ToolTip” button. (8) (Below)
Click on it.
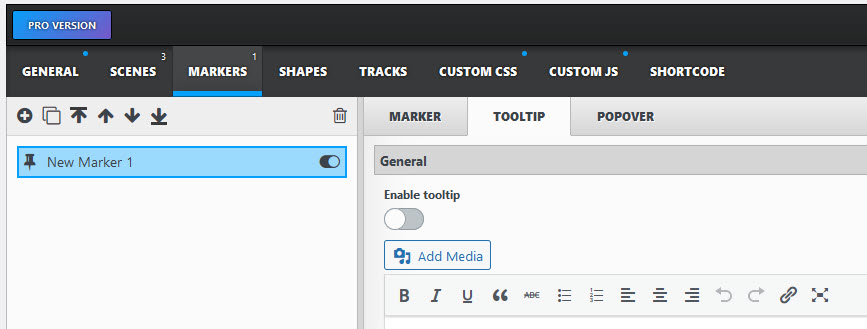
 NOTE: The “ToolTip” is associated with whichever “Marker” you have selected. You will only see THIS “ToolTip” if you select the same Marker later.
Each Marker can have one ToolTip, (and PopOver) but as far as I know you can have unlimited Markers.
Make sure you “Enable it” (9)
(11) Type in your text here. i.e. the name of the room, what you are pointing out, etc..
(10) In the preview window will be the “target” to allow you to move the ToolTip where you want it. i.e. on the door to the room you want to enter, or an interesting items in the panorama.

Sometimes I need to zoom far out so I can find the ToolTip target, then move it to the correct area, then zoom back in. Best way is to pan the top view until you see where you want the marker to be placed, then create the ToolTip.
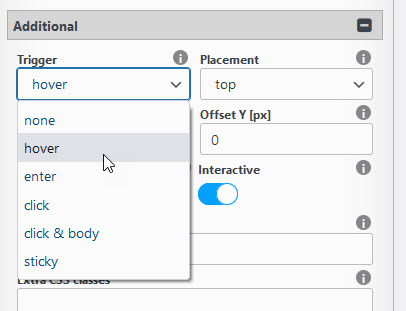
Below that click the “Additional” button.
Then click the “Trigger” button, select the action you want to happen.
Experiment to see what they do.
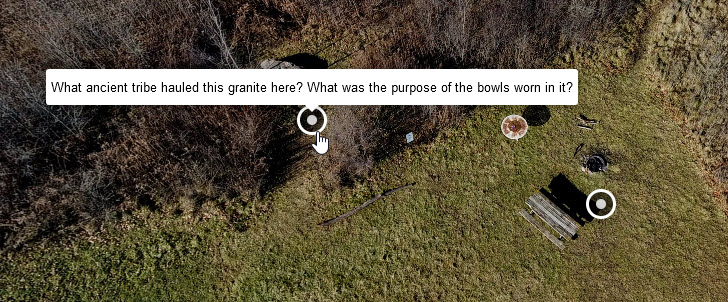
If you now go to “Save”, (16) and then “Preview” (17) you should get a new browser window with the iPanorama project you made appear. This is what your ToolTip should look like now. Depending on “Action” you used when you click, hover, etc. the text you entered should appear.
If you want to go another step you can add “PopOvers”. They are great for showing additional detail in your scenes.
Continue with the Scene-Marker that you want. Then create the Popover (12).
Remember like the ToolTips, they are dependent on the Scene-Marker you select in case later you cannot see this ToolTip/PopOver, you are probably in the wrong Scene.
Make sure you enable it. (13). You can add more simple text, but pictures make it happen! Click “Add Media”, then select the photo you want. You can still add descriptive text if you like.

Save everything, and preview it. Click on your ToolTip and you should see your close up photo! (Or whatever you added into the PopOver.)


In the main 360 view, the rock is seen, but you cannot really tell what it is. The Popover can show this in better detail. (But my photo isn’t so good because you cannot really tell the scale of this thing. It’s actually fairly large!)