Still playing around with the iPanorama plugin for Word Press. When reading about the features on the web site I noticed it said there was a compass to help keep you headed in the right direction!Since I do mostly 360°’s of nature preserves and trails, I thought a compass would be nice. I never could find out how to make it work, and so wrote in the support forum to see what was the secret!
Turns out, it was turned on in the program, one of those many little things that get missed during a major update. No problem, the author soon restored it, and I was off to the races!
It was nice, but I thought it lacking, at least for what I wanted.
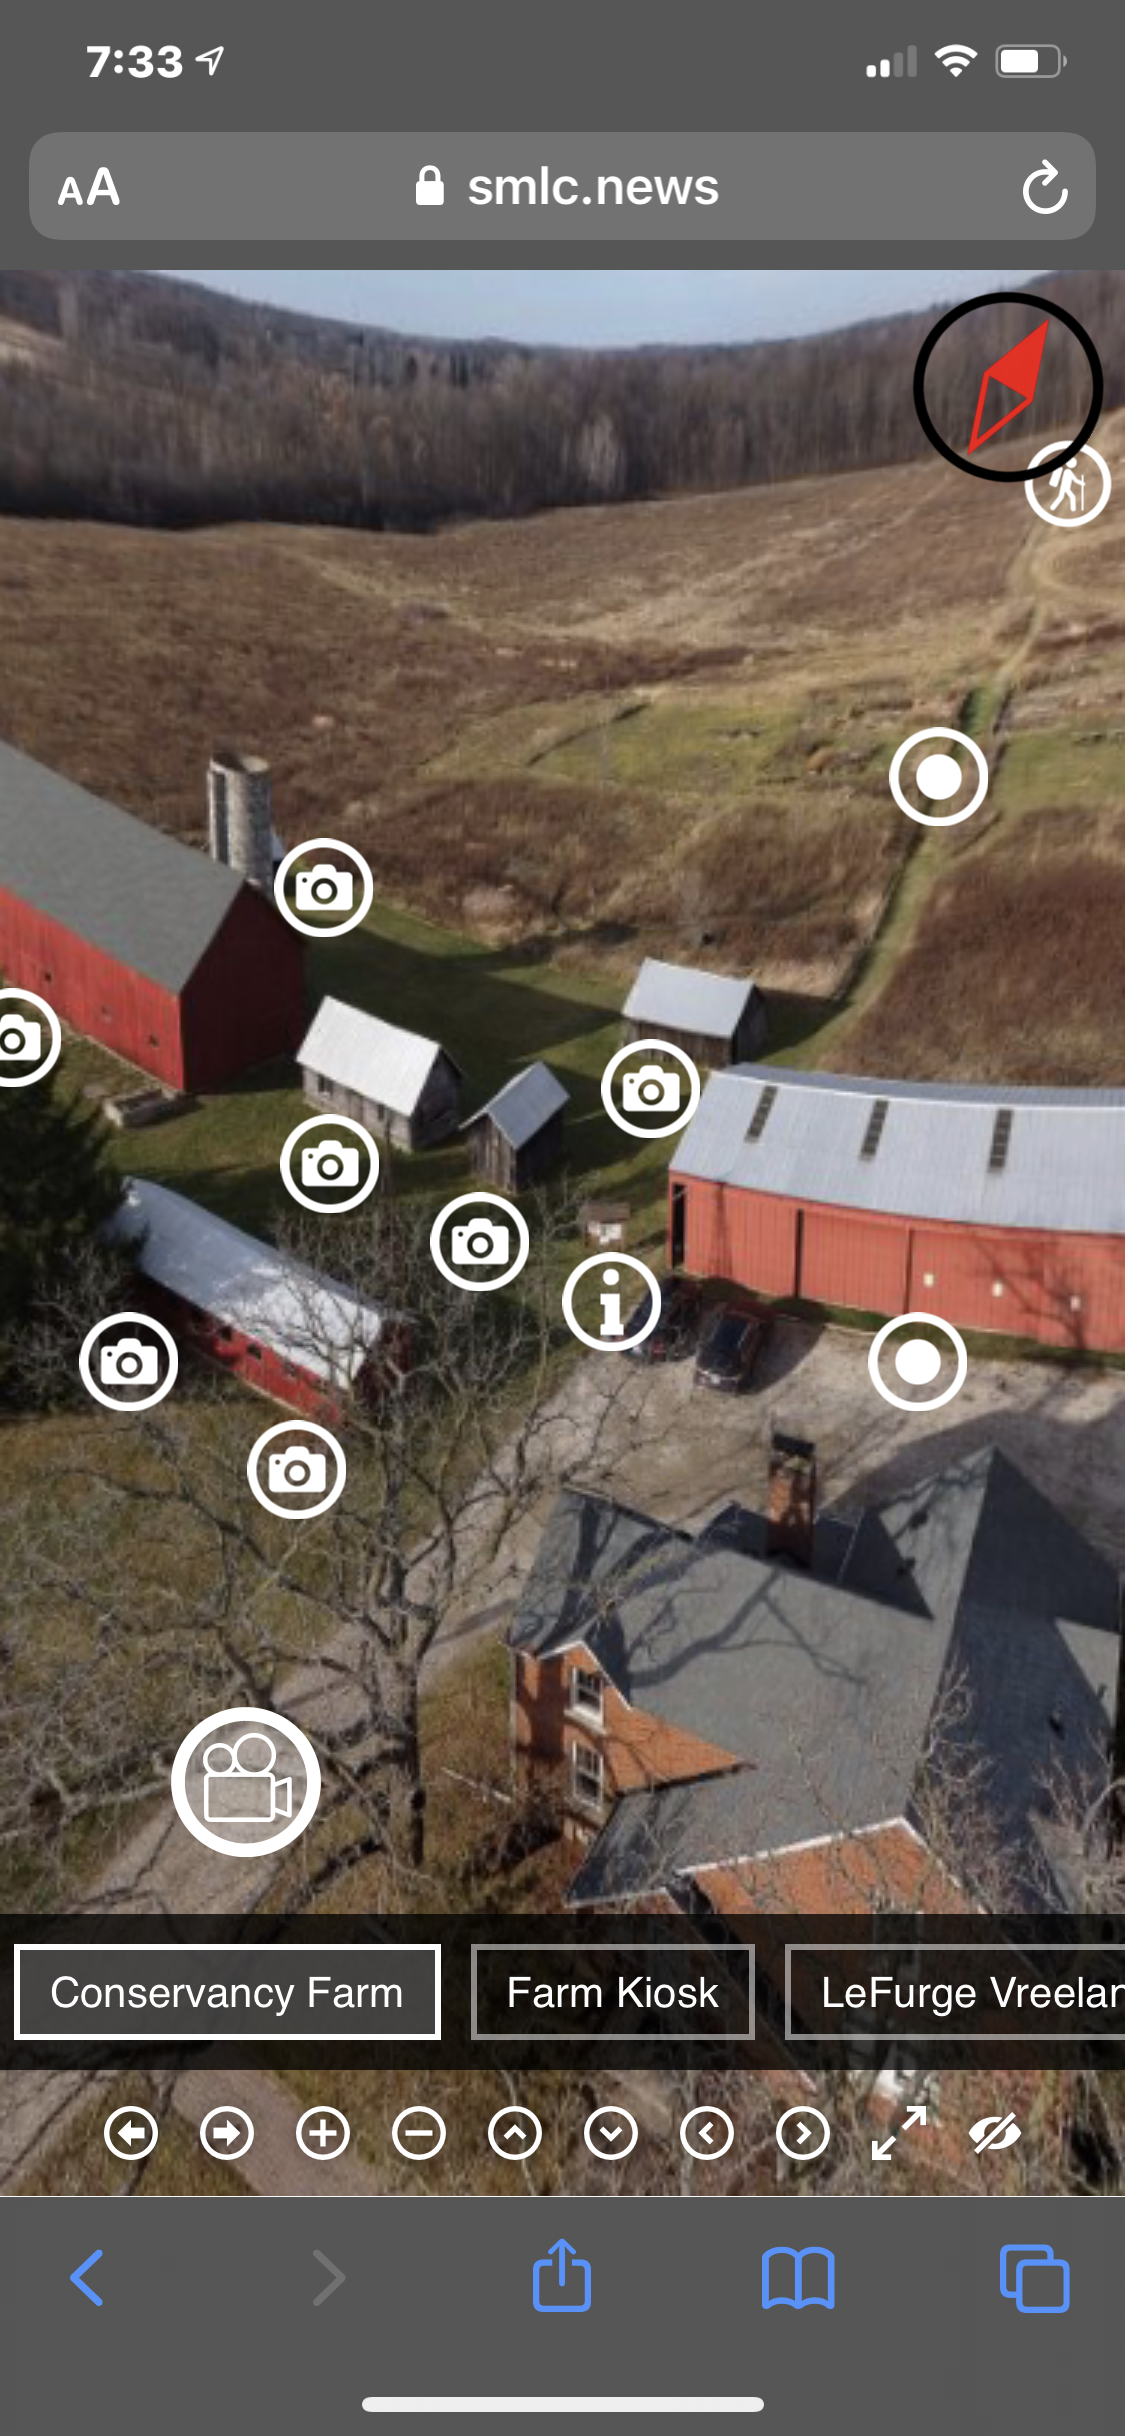
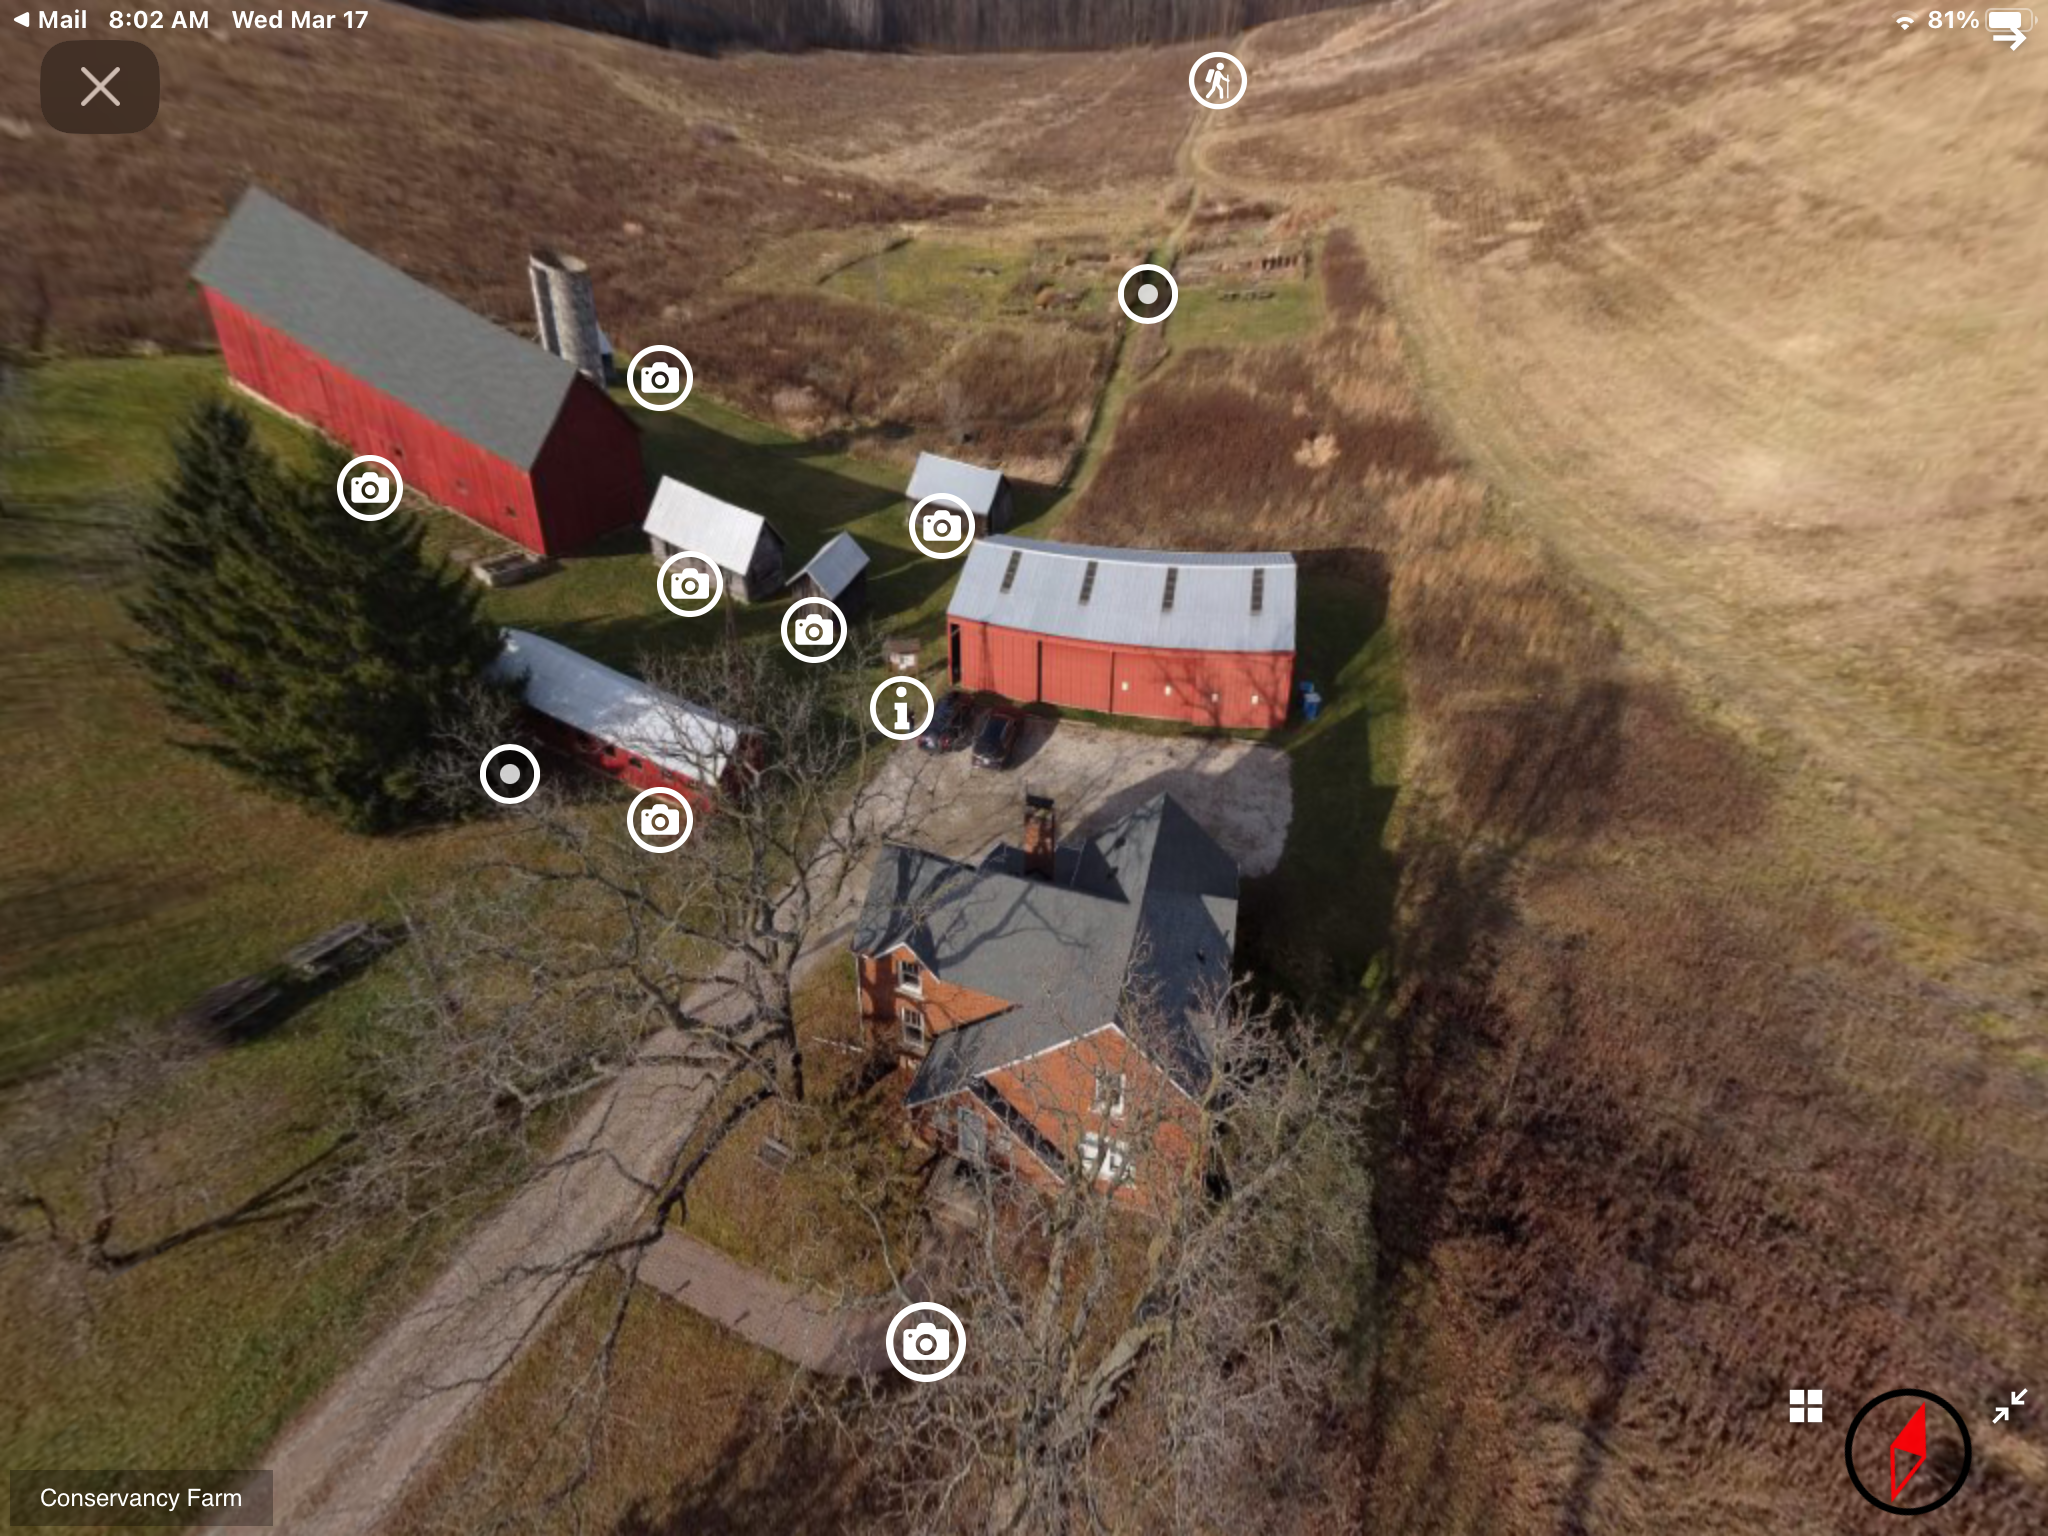
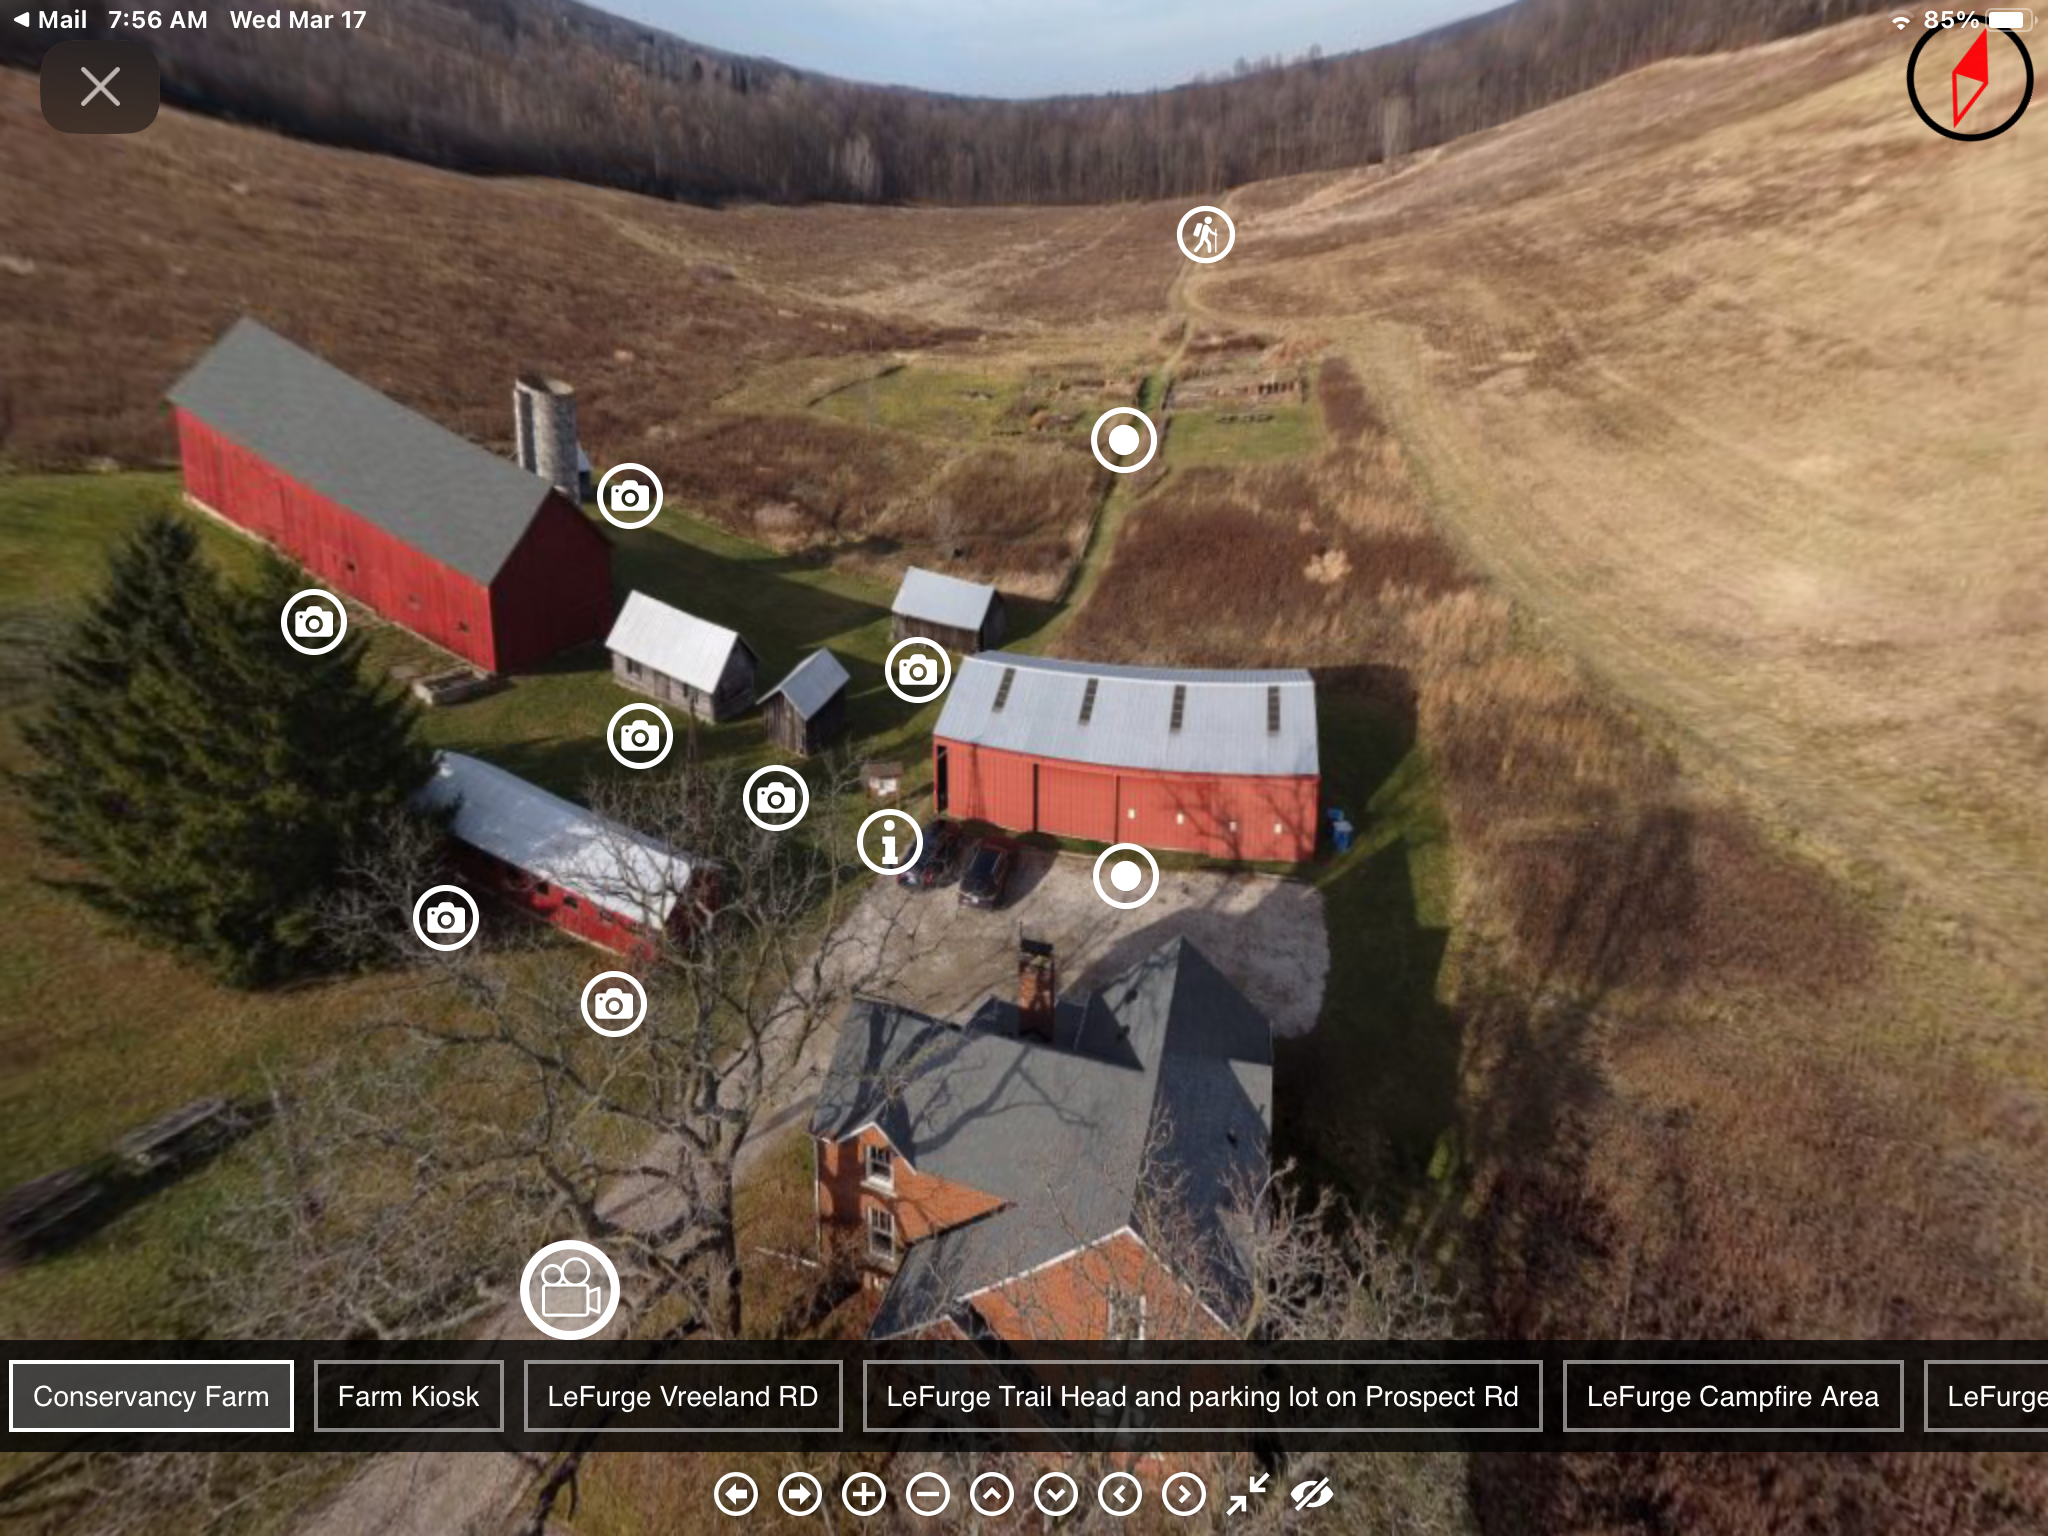
As you can see, it was quite small, and being black and white was not easily noticeable. While some people may like the fact that it is unobtrusive, it wasn’t for me.
I wrote the plugin author and asked about if, and how it could be changed. He replied promptly that yes it could be easily done in the “Custom CSS” section. Unfortunately as much as I wish I was able to program, I can’t.
He was very accommodating and sent me some sample code. I tried it, and it works so good! And while I can’t write original code, I can often hack up what is there to tweak it to my tastes.
So, if you have an interest, and want to add, or change the compass. Here are my hopefully simple directions.
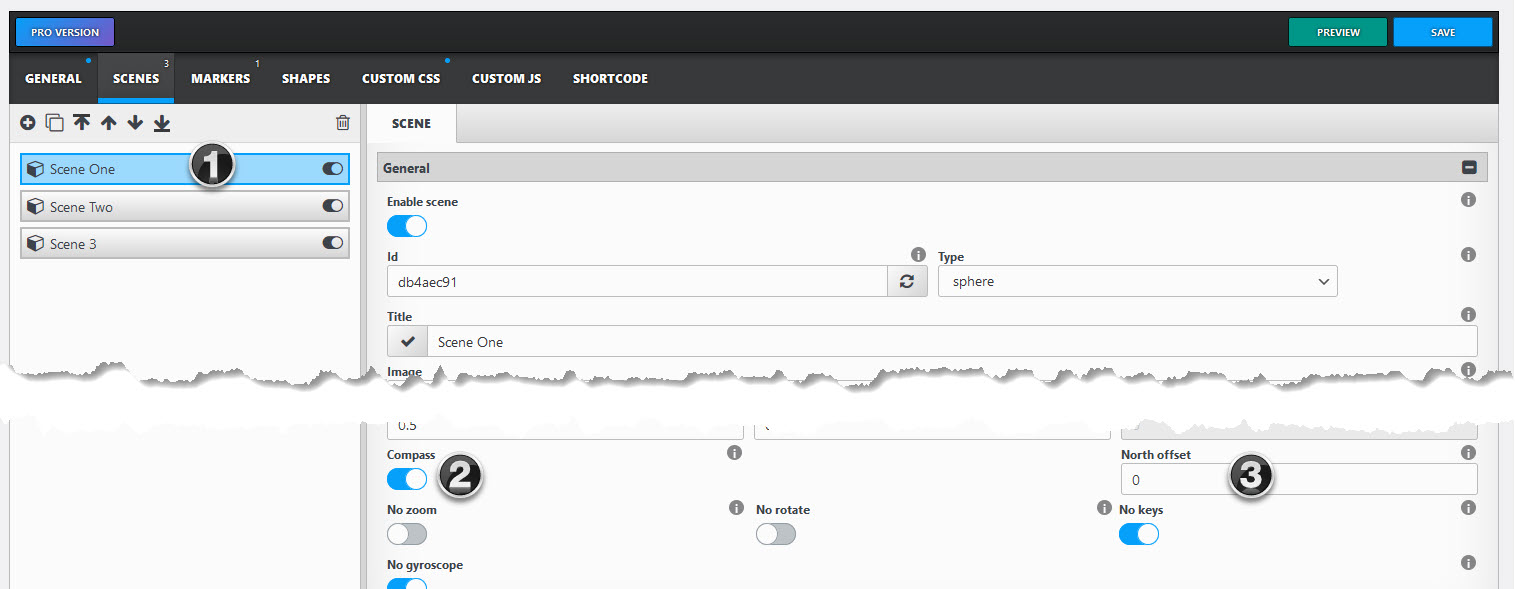
- (1) In the scene you want a compass to appear in first make sure it is enabled.
- (2) In the settings, turn the “Compass” slider on.
- Note that you must do this for each scene in which you want the compass to appear.
- (3) There is a field for “North offset”. Nothing to do now, but you may want to come back here later. If your compass does not point north correctly change the degree offset here.
- Tip: clicking on the compass points it due North. If the image is not showing North at the top rotate the image so North is “Up” then note the current angle and estimate the degree change needed.
- Save the tour, then if you use the preview button you should see the default small arrow. Where it appears depends on the widget (Theme) you are using. It should look like Figure 1 above.
But you don’t want that plain old compass do you! First you need a good compass image. Then to change the default to your custom image, copy this code into the “Custom CSS” window:
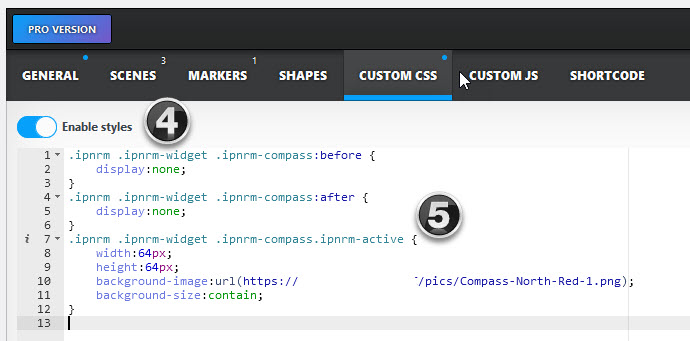
(4) Make sure you enable styles!
(5) enter or paste the code and modify the URL for your compass image.
.ipnrm .ipnrm-widget .ipnrm-compass:before {
    display:none;
}
.ipnrm .ipnrm-widget .ipnrm-compass:after {
    display:none;
}
.ipnrm .ipnrm-widget .ipnrm-compass.ipnrm-active {
    width:64px;
    height:64px;
    background-image:url();
    background-size:contain;
}
?
You can further tweak the size using the “width” and “height” parameters.