This entry is part 5 of 10 in the series iPanorama
Using iPanorama 360 to create virtual tours? Would you like to open a specific scene at times?
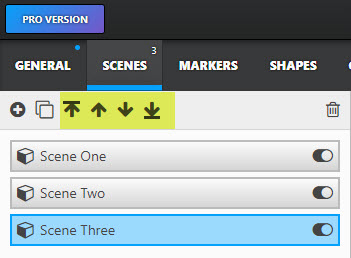
First, if you just want a specific scene to always open first, you can rearrange the scenes using the UP/Down arrows
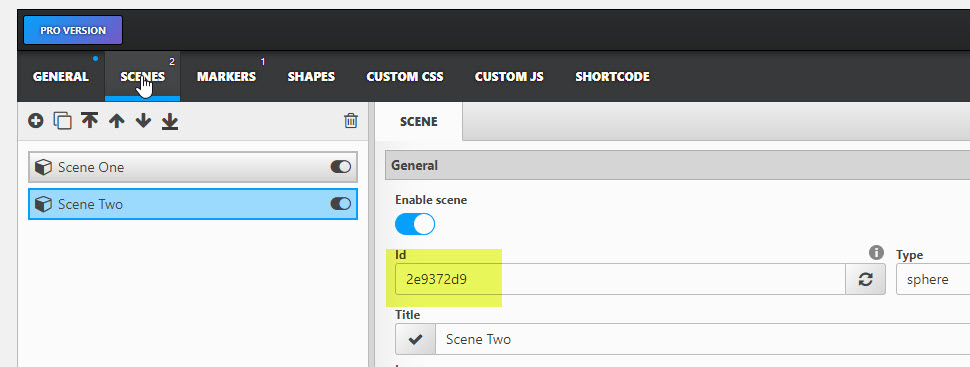
But if you just want to look at a specific scene for whatever reason you can use the short code with the sceneid. Note that each scene has a unique ID… yes it’s obvious, or you couldn’t specify the scene! Just watch which scene is highlit before you grad the Scene ID!
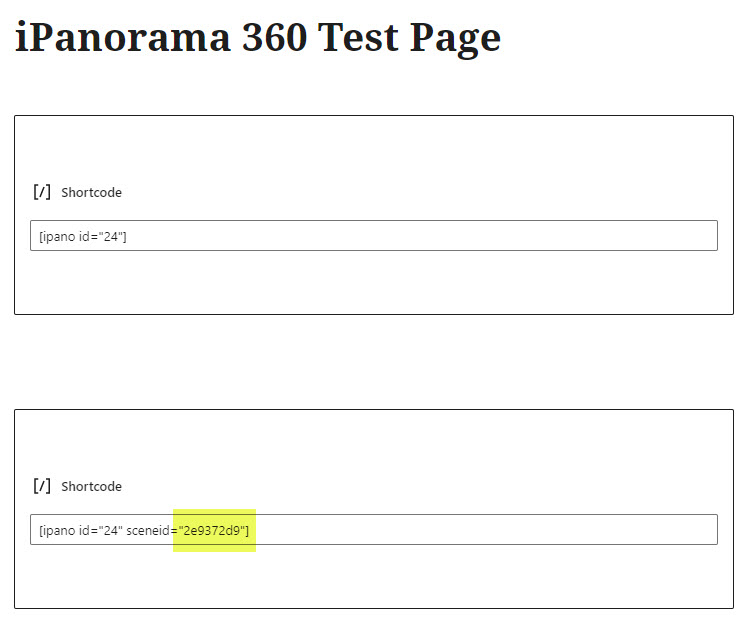
You should end up with the following.
ToolTip One
PopOver One
Marker One Tooltip
This one is the default opening scene #1.
ToolTip One
PopOver One
Marker One Tooltip
This one is using the custom sceneid, and you can see the “Scene 2” is highlighted, and different than the default.
I could see a use for this. One thing you could do is to create a page with buttons, then link each button to a different scene. While there are built in “widgets” with different styles, you may want to try and create something to match your web page.
I thought you should be able to use the iframe+URL+ID+SceneID but so far I cannot make this work! iframe width=”560″ height=”315″ src=”https://www.kasdorf.name/wordpress/ipanorama/virtualtour/test-after-upgrade-to-pro” sceneid=”2e9372d9″ frameborder=”0″ allowfullscreen></iframe
This entry is part 1 of 10 in the series iPanorama
I have been playing around with my drone, getting some aerial shots of the local nature preserve. LeFurge Woods Nature Preserve, on Prospect Road, just a ways North of Geddes, and South of Cherry Hill.
I find 360° “Globe” panoramas to be intriguing, and have since back when it was a challenge to stitch pictures together, then make a .mov file, and even to get a player that would work on a web site.
Now it is so much simpler, and the options to make and enhance them are great.
Following is a “Tour” I made to go from one part of the preserve to another using the links inside the panos. Some of the icons you hover over to see information, some you can also click on to see a picture. The “^” icons is a jump to another location. You can go back and forth. Great fun indeed!
Use the icon in the bottom right to go full screen for the experience! Use “esc” to close again.