Garmin Foot Pod Calibration 43

Garmin Foot Pod Calibration 37

Garmin Foot Pod Calibration 25

Garmin Foot Pod Calibration 34

Garmin Foot Pod Calibration 28

Garmin Foot Pod Calibration 13

Garmin Foot Pod Calibration 16
Garmin Foot Pod Calibration 43
Garmin Foot Pod Calibration 37
Garmin Foot Pod Calibration 25
Garmin Foot Pod Calibration 34
Garmin Foot Pod Calibration 28
Garmin Foot Pod Calibration 13
Garmin Foot Pod Calibration 16
Been playing around with this, and found how to add an overlay.
Seems like it has a lot of possibilities, especially on known routes such as established races.
If you run with a GPS watch, you can probably make an overlay easily from the watch data. I did one below.
Save the file as a KML.
Add it to a directory on your web host.
Put the URL to the KML file in the Real Time Tracker set up “Custom Map Overlays”, like this.

Adding a KML file to Real Time Tracker
The go to the Map page, scroll around the map until you find where the run is.
You are ready to go. I need to get out and try this soon. I am hoping it will add a track right on top of the “planned course”. I see this as really useful when out of town running a race so others can watch the progress. Actually even if they are at the race, they can track on a smart phone to see right where I am at, like coming to an aid station, or nearing the finish line! Pretty cool!

A favorite trail run overlay KML.
The Scotiabank Toronto Waterfront Marathon route created as a KML file and added to Real Time Tracker.

The Scotiabank Toronto Waterfront Marathon overlay KML
I have been searching off and on for a way to let people know:
I tried a number of different ways, none seemed to be what I wanted.. there are programs that let you send the current location via email or SMS, but they did not do what I wanted. Some only have “fences” that can be programmed to let someone know when you get to a certain place, which is nice, but by the time I get to the end it is to late to let the person know.
Finally I came across “Real Time Tracker”, by Greenalp. This does what I have been looking for!
Check out the last, or current run!
![]()
This is particularly useful for runs when I am away from home so people can track if I am running or in a ditch. It can also be used during races to see where I am on the course… or pretending to run while I am sitting in a bar somewhere.
Recommended!
Until Real Time GPS is false,
George
After I found a few early attempts to make custom POI files to be both entertaining and useful I have been experimenting with other GPS projects.
The latest is figuring out the best method to actually put these POI files into the GPS unit.
As the collection of custom POI files grew the aggravation of loading them into the unit also rapidly increased. I felt there must be a better method of updating and uploading these to the Garmin unit.
A little background on how POI files work. ??????? ???? ???? ????? *Disclaimer* I am no expert on Garmin (or any other GPS) units or the software. I just have experimented with them and this is what I found in practice or researching on the web.
It seems the way the POI file works, if you use the Garmin POI loader anyway, is that it takes the directory of POI files you specify, then goes through the list and presents each one to you. You make the selections as you go (see earlier posts on this.) and when each file has been reviewed it compiles your selections into one POI file called “POI.GPI” and uploads it to the GPS unit overwriting the existing single POI file. The upshot of this is you must add every file making every selection (ignore, alerts, distance, etc) every time for every file. If you do not do so it does not add that POI file to the compiled file to upload. Then when you go to your new “Custom POI” files in the unit you cannot find them. If you are adding or updating any one of your custom POI files having to re list every one of your “sub files = .cvs file” can get tiresome very quickly. So I started looking for a way to get around this by hopefully being able to update single POI files.
*GPI is “Garmin Points (of) Interest”.
After a few false starts it seems the best way to accomplish this is to create individual POI.GPI files still using the Garmin POI Loader software…. just making a different selection and then uploading the resulting files (Note the plural “files” here…) manually…. which is what I am going to show you in the remainder of this post. The Garmin unit when turned on will find all “GPI” files located on the unit whether they are on built in memory, or on an SD card in the slot. This actually caused me some confusion for awhile, see more on this in the next post.
So… let’s get started.
First, you do have the Garmin POI Loader software installed, correct? If not go to the Garmin web site, download the software, install it and return to this page.
Here is the download page on the Garmin site.
…. taps fingers…. whistles a short tune…. plays five games of solitaire…. OH, welcome back.
NOW let’s get started.
Open the POI Loader.

Click on the “Next” button.
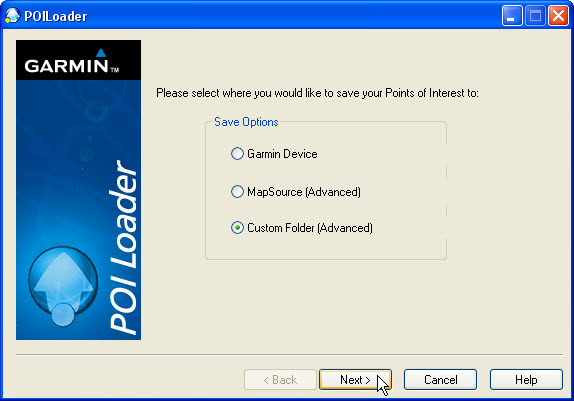
Click on “Custom” Folder (Advanced). ????? ??? ???? ????? See you are already an advanced user after only a few minutes of reading this article.
Now click on “Next”.
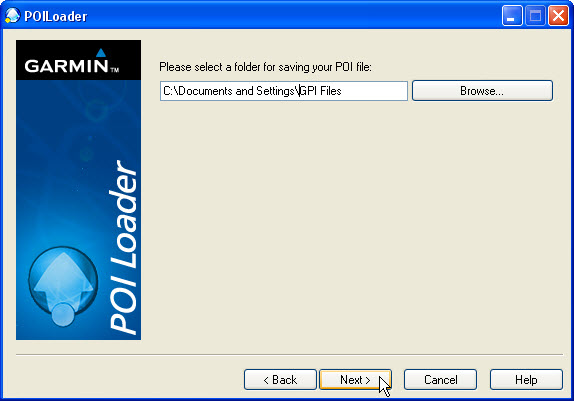
Oh wait… let’s take a slight detour…you might want to create a new directory to put the individual GPI files you are about to create into… just to keep some order to things here. I created a “GPI Files” directory for this purpose.
Now select the new folder using this screen.
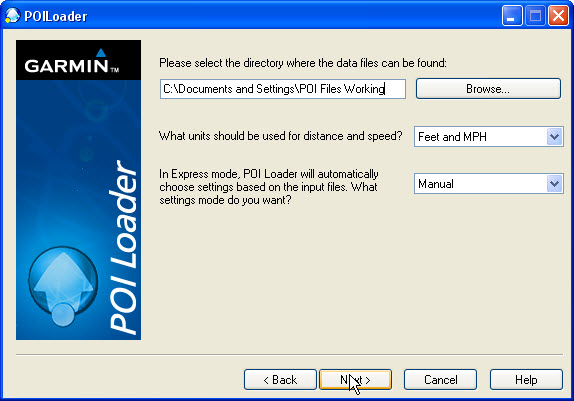
Now you do the same thing, except this is where your custom “cvs” files are being kept.
Again, you may wish to create a new blank directory and move only the files you want to work with into it. Remember the loader is going to ask you information on every cvs file in this directory. You may find it easier and quicker to move one or only a few files into this directory from your “Master” directory especially if you have a lot of .cvs files.
In this screen you definitely want to select “Manual” or it will process everything in the directory you specify thus defeating the entire purpose of this guide.
When you are ready, click on “Next”.
When you click on next it presents the selections you can make. These selections are not that complex, but actually do create different types of files…. “alerts”, “red light warnings”, “speed alerts”, “Tour Guides” and so on which are beyond the scope of this post. If you do not know what they do, for now you can just deselect both of the check boxs. UNLESS you have multiple .cvs files in the directory you specified. Then you want to select the “Ignore this file? for everything except the first file in your list… then when you cycle through this process to create your next gpi file you will “ignore” the first file, use the second the ignore the rest of the files. All this depends on how many files are in your directory. Bottom line is that during each “pass” through this procedure you only select one file each time.
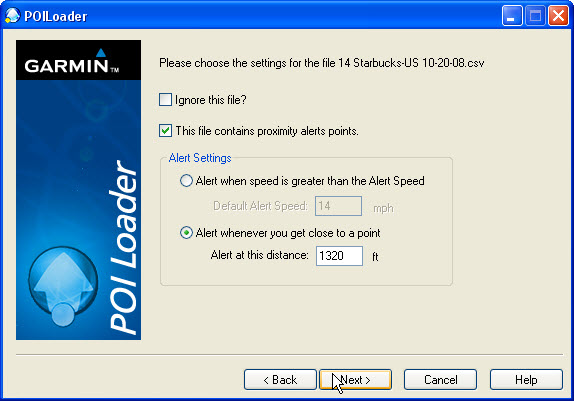
After you use the first .cvs file presented “ignore” all the rest of the files you are asked about.

When you get to the final .cvs file it will automatically create the new POI.GPI file where you specificed earlier.
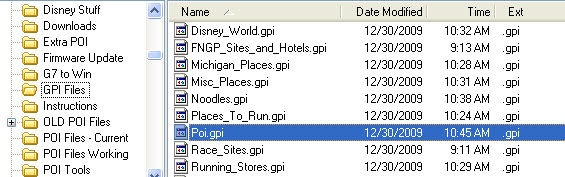
Now, and this is important, you must rename the “Poi.gpi” file to something else. I give it the name of what types of locations are in the file….. if you do not do this when you go through the steps above to create your next gpi file it will just overwrite the existing Poi.gpi file with the information from the selected .cvs file. It will automatically create the Poi.gpi file you do not have to copy and rename it.
Continue through the steps above until you have turned all your xxx.cvs files into an equivalent xxx.gpi file. You should have a directory full of .gpi files like shown above…. of course yours probably will have different names!
In the previous post in this series I explained how to create multiple .GPI files so you can edit just that file then update it in the GPS without going through every .CVS file that you have. This post explains how to add the files to your GPS unit.
Plug the unit in to your PC using the USB cable.
Hopefully after a few seconds (?) you should get the typical Windows (Oops, you are using an Apple? You are on your own…..) pop up that asks what you want to do now.
Select the “Open folder to see files” option. You may have a better way of doing this, I use Power Desk Explorer myself, but for simple explanation will use the Windows Explorer for now.
You should see a list of directories and files listed.
I made a new directory (folder) “Garmin GPI”.
Open another Windows Explorer pane. Find the directory in which you earlier created your custom GPI files. (Maybe the same directory name?)
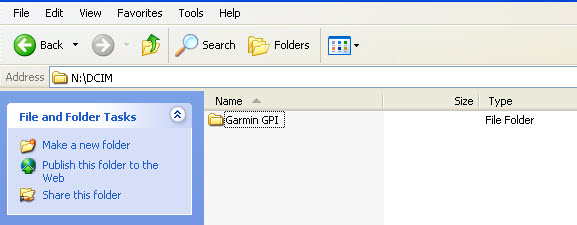
Drag all the files from the directory on your PC to the directory on your GPS. (Or… your SD card directory if you are doing it that way.)
You can move these files to an SD card and then insert it into your GPS unit also. When you turn the GPS on it will read the card and ask “If you want to make these available when the card is not inserted” (or something like that.) If you say “Yes” it copies the data to the GPS memory. At this point you could remove the card and the GPS would retain the POI points. Thats great, unless you also happen to have MP3’s or pictures on the card you want to listen to or view later in which case they are not available. You could leave the SD card in the unit, but then an interesting thing seems to happen… all your POI files will appear to be duplicated! The unit remembers that you added the custom POI’s to it’s memory so reads them, but then it also reads the card that is inserted and presents what it finds there also…. so you have two of everything. Initially this caused me some confusion, like what happened here. So I deleted everything and started over… after several times of the same thing happening I figured it out. Slow but get the job done…. usually.
So, if you select the “Add” option when presented you may want to remove the SD card, delete the .GPI files from it, then put it back in. I think that should resolve any duplicate issues.
Using your new POI files.
Start the GPS.
Select “Where To?”

Use the “Down Arrow” to go to the second page of options.
Tap on “Extras”.
Tap on “Custom POIs”
You should see a list of all the custom POI/GPI files that you have created an uploaded to the unit.
Select the one you want (Here it was Disney World)
Now you will see the individual locations in the file.
Just tap on the one you want directions to!
I want to go to the Magic Kingdom in Disney World Orlando… about a 964 mile drive it looks like.
Tap on “Go!” and it will calculate and program the route.
You can also select one of these options to display at the bottom of the window.
Before you begin your trip go in and reset the Trip Meter! Later you can retrieve the information from here on how far you drove, how long it took and other information. Advanced users can also use the .bin files to create maps on Google Earth and fun things like that.
Now you are on your way!