In a previous post I stressed making sure you saved your original .CSV file which you imported into your Magellan GPS since it creates a .MGLN format file. At the time I did not know a way to edit that file in the future. A little research found it can be done. If you have an Magellan “.MGLN” file in your unit here is how you can save it to allow editing with some of the tools I have previously recommended.
Open the Magellan POI File Editor.
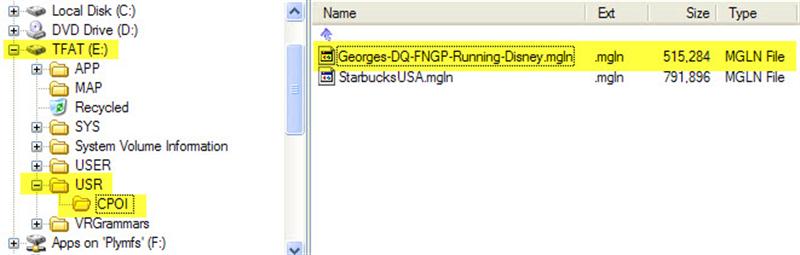
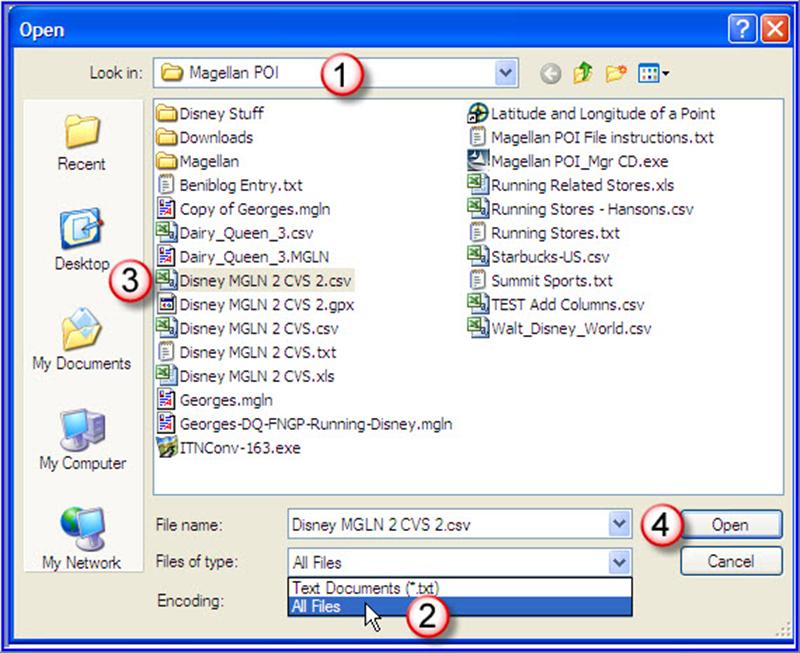
Find the .mgln file you want to edit. You did save it. . . right? If not, all is not lost. If you plug your Magellan unit into a computer using the USB cord, it should link up. Use Windows Explorer (or a better method like “Power Desk”) to find the unit. Work your way through the directory structure until you find the .MGLN file you want. Copy this file back to your PC.
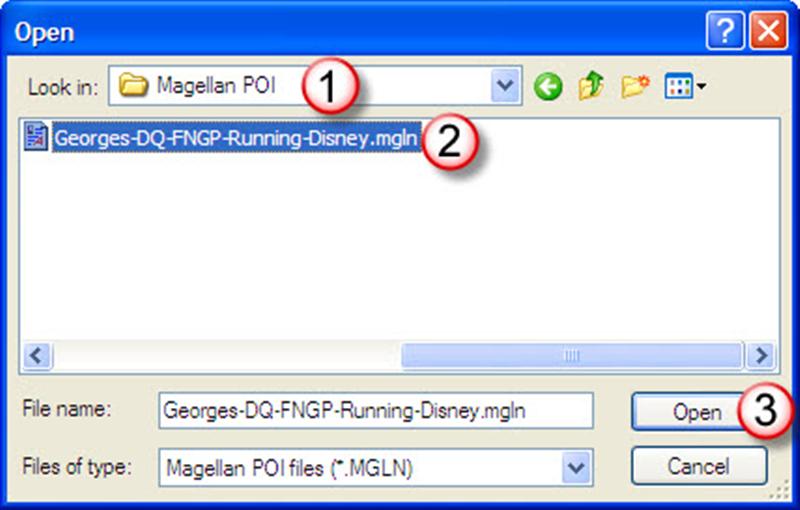
Now open the .MGLN file you previously saved or the one you just retrieved from the Magellan GPS.
Example:
When it open’s it you should see the list of all the Categories and their POI’s. Pick the Category (5) you want to save so all the POI’s appear in the right pane. (6)
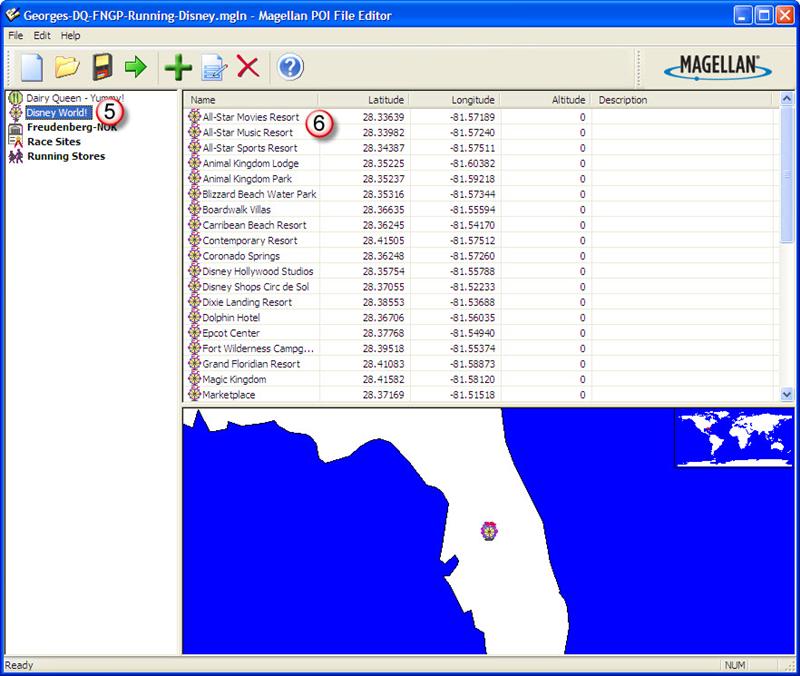
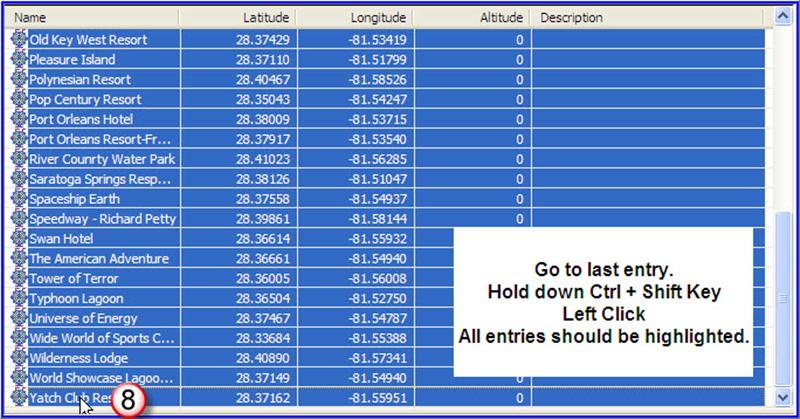
Click on the first entry (7)
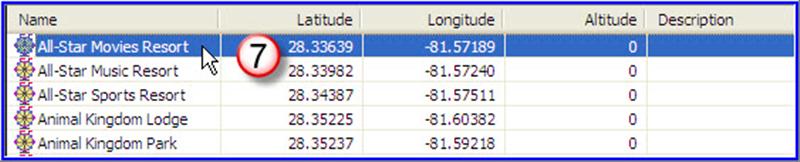
Go to the last entry in the list, or the last items you want to export, hold down the Ctrl + Shift key, left click on the entry. (8) All the POI’s between the first and last selected one’s should now be highlighted.
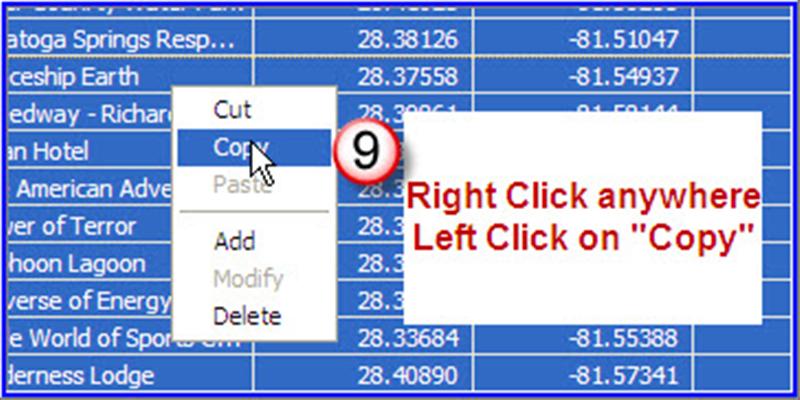
Right click anywhere in the window (Do not left click or you select only the one POI and have to start over!), then click on Copy (9) (Or if you know your shortcuts you can simply use “Ctrl + C” to copy these.
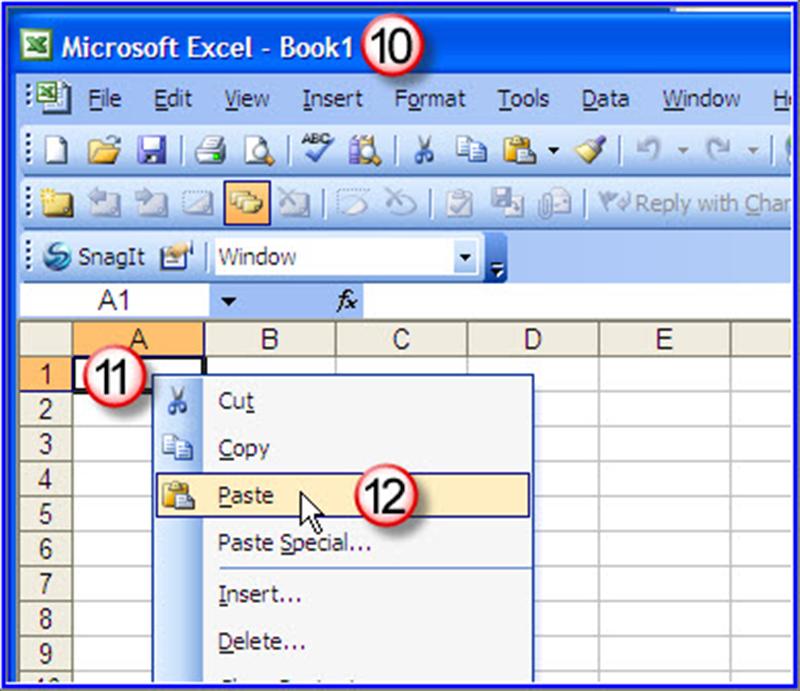
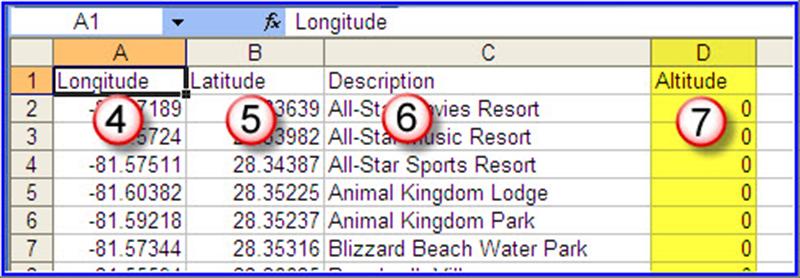
Open Excel, (10) (actually I have found I greatly prefer to use Notepad – or any plain text editor – for this) “Paste” the information from the clipboard. (12) (Or use “Ctrl + V”)
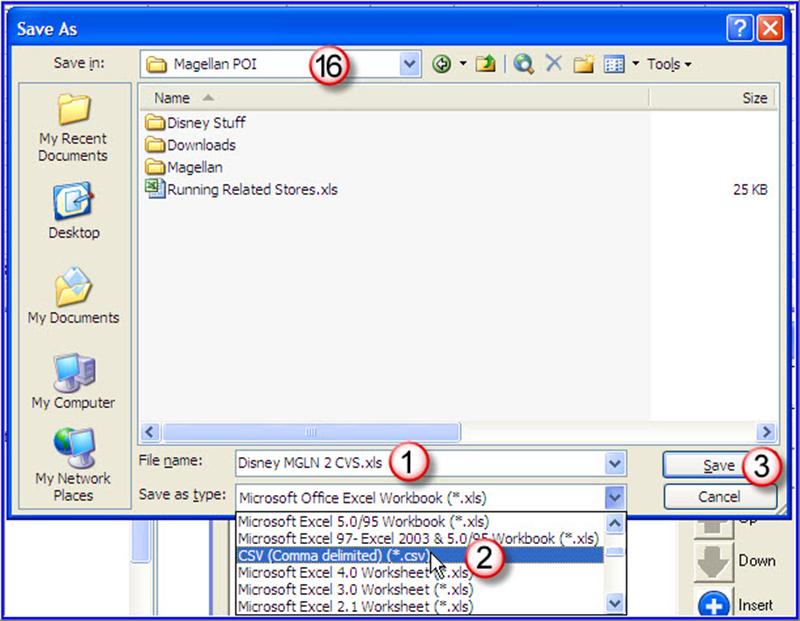
The problem I have found with Excel is it does not seem to save it in the proper ASCII comma delimited text no matter how I tell it to save the file. I only use Excel when I must to reorder some columns – Advanced technique.
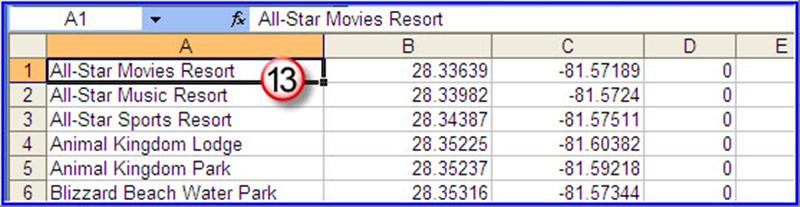
You should see all your data in Excel now. (13)
You can make any global changes here, reorder alphabetically if you want, and even add columns for “Comments” and “Altitude” which the unit will read back in when you re-import. (You might notice column “D” in the screen capture show zero, this is the altitude column. When I created the Starbucks file I used this method to rename all the locations. The original names were to long, and when the unit truncated the name they ended up all the same. I just renamed the first two entries “Starbucks 00001” and “Starbucks 00002” then dragged it down to rename every point sequentially.
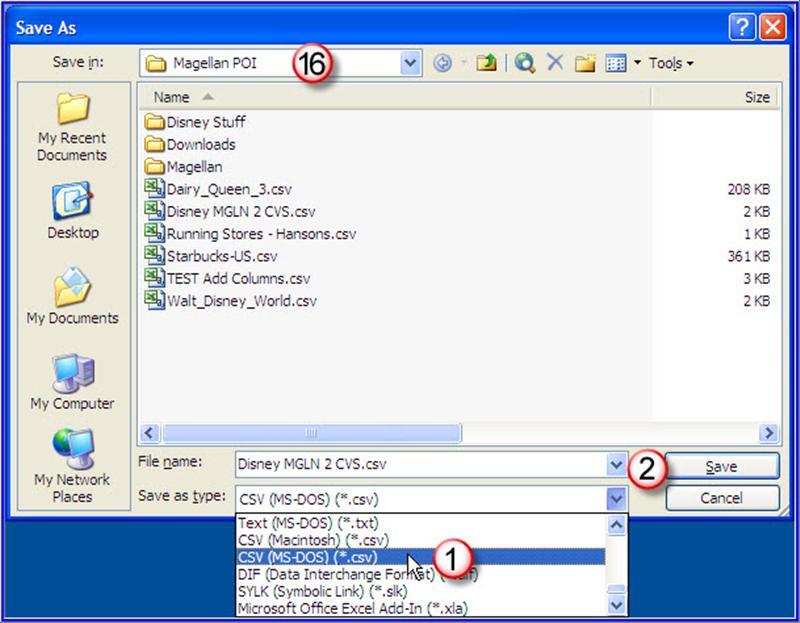
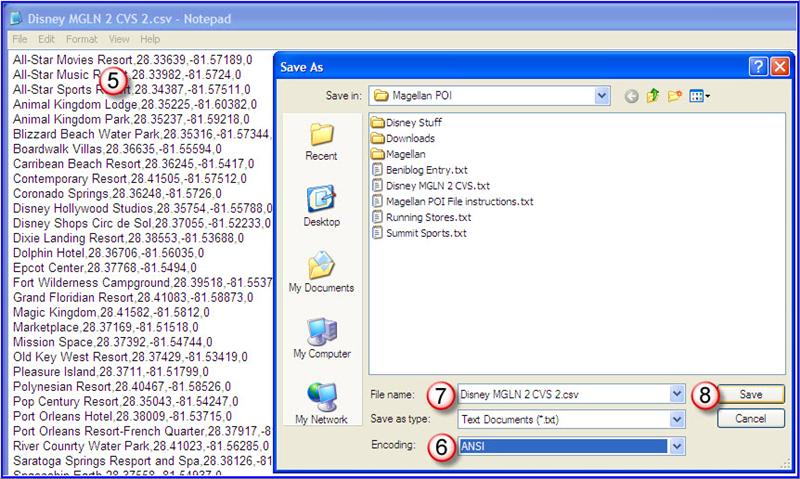
Next, save your file! Put it in a place you can find it again, make a backup copy…. just in case you get carried away editing it in the future and need to go back. Select a directory (16), give the file a name (1), and make sure you save it as a CSV Comma Delimited (*csv) (2) file and then save it. (3)
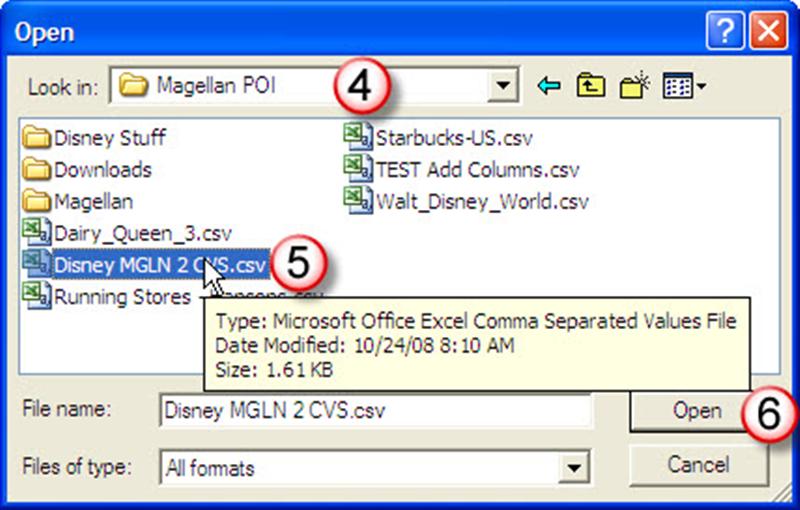
Now you are ready to begin editing and adding new GPS locations! Open the .CSV file you just created. (4), (5) and (6).
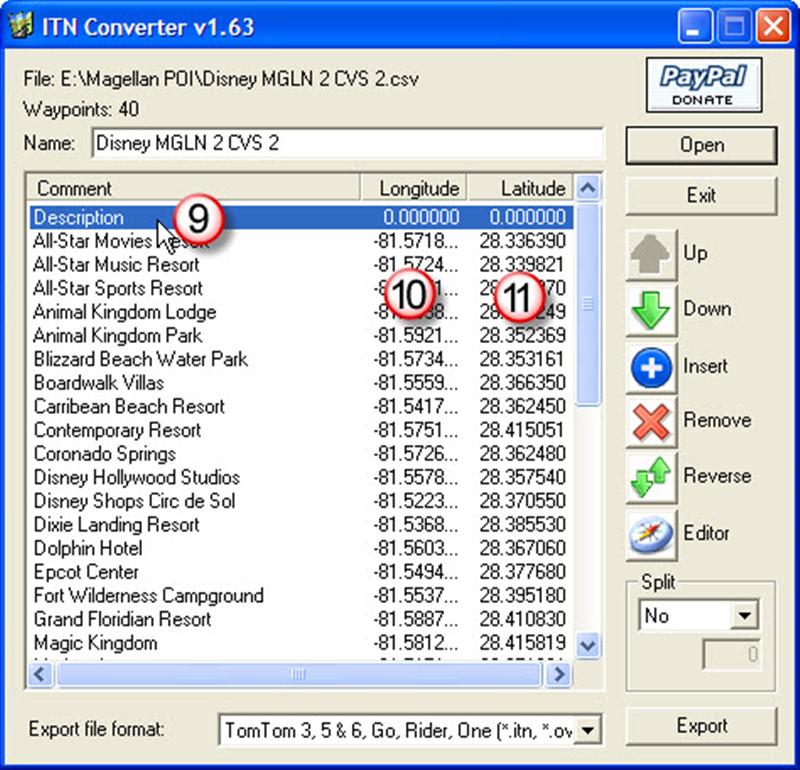
If you open ITN Converter, and then open your new .CSV file you should see all your waypoints listed. Hopefully they appear correct. In this case the data was saved incorrectly so the “Comment” field show the Longitude, the “Longitude” column, something…. and the Latitude is correct.
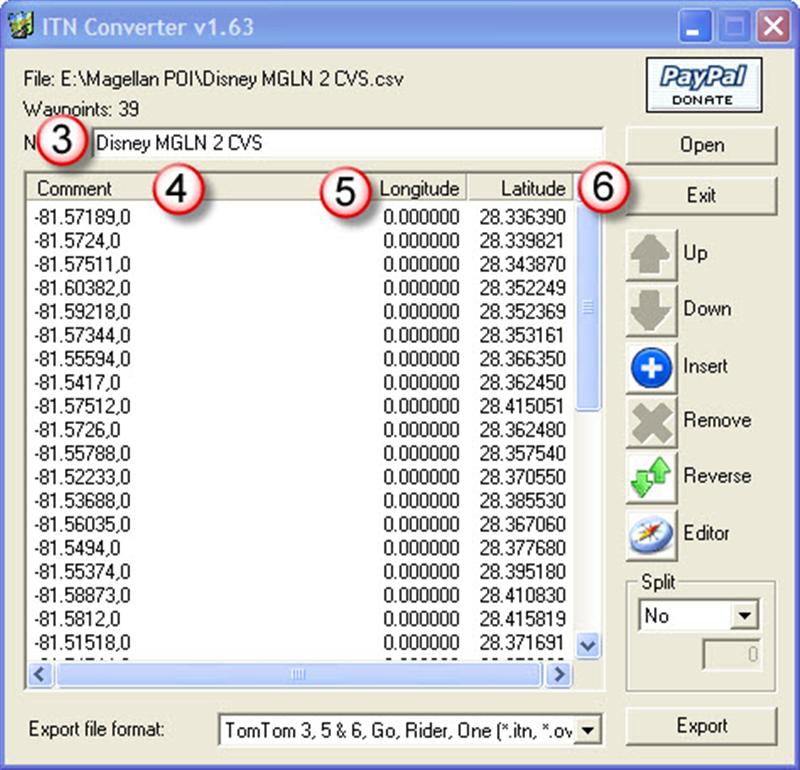
Close the file down, reopen it in Excel and rearrange the columns so they are in this order….. Longitude (4), Latitude (5), Description (6), Altitude(7)* and Name*. *=optional.
If all goes well this time you should see all your points now. Here again is a typical error, notice the first line (9) shows up as “Description”? That is caused by having the header row in Excel, not a problem though, just use the big red X “Remove” to eliminate it. Want to add a new point to your file… I hope so, because that is why we are doing all of this!!! Click on the “Editor” button (the little compass).
The ITN Converter editor screen opens. Depending on the size of the existing POI file and the speed of your PC it may take a few seconds to load all the points. When everything appears to have come to a halt, move on.
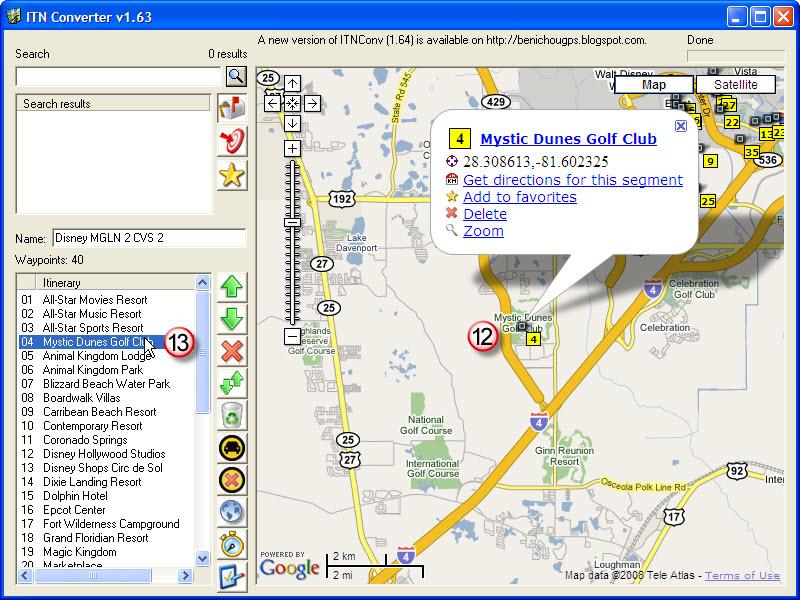
You can click on an existing point (13) and it will appear in the Google Maps view pane. I really like the satellite view for doing all this since you can see if the location seems to make sens for the point you are using. (12)
Here is where the fun starts. Put in a place, address, name, etc in the Search box at the top left, click on the magnifying glass and the program should return a location, or a series of locaitons. Click on one and it will appear in the map on the right. Is this what you wanted? If so, you can click on the name in the box and rename it to whatever you want. Remember to click on “save” or it will not save the change. Then click on “Add to Itiniery” and it will add it to the points in the left pane. Cool!! and fast! A tip, if you want them in any particular order (Not a huge deal since the Garmin will alphabeticze the automatically anyway.) Click once on the place you want the new location to appear ahead of so it is highlighted. Now click on the point and “add it to your itineary”. It should appear where the cursor was at. Add all the points you want then go to the next step.
When you “Exit” or “X” the editor it will add all the new locations to your list automatically. Don’t look for a save or anything, I don’t think there is one, just close it. Trust me, or try it with just one point the first time…..now do you believe me?
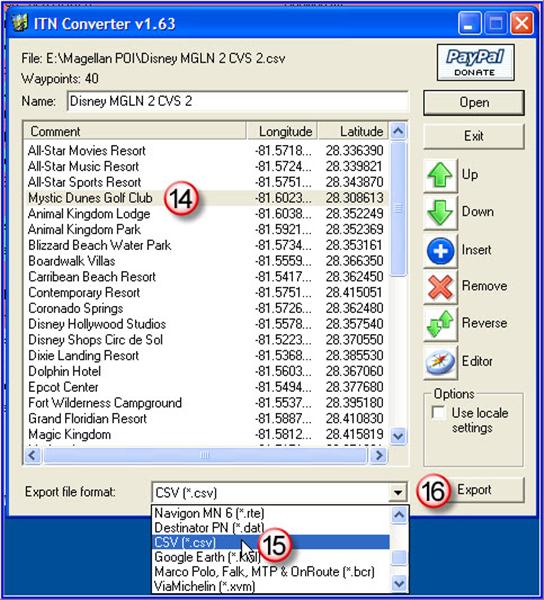
Now you should see your new points (14) in the list. You can drag them up and down to put them in any order you like. When you are happy with everything get ready to save the file. First under the “Export file format” pick CSR (*csv) (15), then all that is left is to click on “Export (16). Pick a directory, (16) and click on give it a a name (1), type (automatic) (2) and save it. (3)
Now if you want to verify, open the “new.cvs” file using a plain text editor (or Excel) (1), (2), (3) and (4).
You should see all your points, in a nice order. (5) – Now, SAVE A COPY (6), (7) and (8)
Until the final POI becomes boring,
George