FTP to an iPod Touch (in 125 easy steps!)

This entry is part 1 of 4 in the series FTP to iPod Touch

Well, really it isn’t nearly that many… if you do it right the first time, or maybe even the second.

Why am I writing this… the result of a “quest”. After being inspired by a person working on their family tree, I have been working on the family genealogy a little recently. Since I migrated to Windows 7 (64 bit) my old Ultimate Family Tree program would no longer work. I searched around a little, and bought Family Tree Maker.. for the third time. I used it once, maybe twice and decided it did not do what I wanted. To basic, not enough flexibility. So backed up and tried “TMG” The Master Genealogist. A very full featured program. It does come with a bit of a learning curve, but working a little at a time and reading what I could find I am getting it working. One really great add on is “Second Site” a program that reads the TMG data and creates web pages from it… and what web pages. There are more options than you can deal with (almost).

While researching I started reading the forums on TMG and also the Roots L for TMG. One question came up, “How can I put my data on an iPod Touch (and/or an iPad). No one seemed to have a complete answer. Most responses were to create a GEDCOM file, use a software that could then import to iPod and read the GEDCOM. I suppose this works, but it got me to wondering if and how I could transfer any files, and use my Second Site web site on the iPod or iPad. Several articles I found seemed way to complicated… some apps seemed way to expensive to try “just for fun”.

I finally found an app on the Apple Web Store “FileApp”. It sounded like it would do what I wanted, and had the benefit of being free so it it did not work I was out nothing except a little time and effort.

Continue reading

Now this is “Blog-Worthy”

Sometimes it is the simple things in life that can give the most pleasure! I have been using WordPress for years now. I just looked at the archives and it appears the first post was October 30, 2005. However since in that entry I wrote about adding an RSS feed to the blog I have to believe there were a few earlier posts also, they must have been lost. I vaguely remember a great crash that took out the blog at one point early on so unless they are cached somewhere on the web, they are gone forever. But that is not what this was about. . . I digress.

Ah yes, simple things and pleasure, now I remember.

Ah yes, simple things and pleasure, now I remember. During the last five years of using WordPress I have gone through many core upgrades. (Replacing the WordPress code on the server with updated code.) The early ones were stressful, delete these files, add these files, change the text in some files, update everything and hope to heck it works when you are done. The early loss mentioned above was traumatic, but since it was very early on in the life of the blog it wasn’t enough to where I would say “To hell with it, I am not going to try and recreate all that”… plus it was early on in the life of the blog and I was full of spirit yet. Then the WordPress team cam came along with “Automatic” updates where all you had to do was press a button and TA-DA, the script ran and the core, plug-in etc. was updated without the user having to do anything… other than push that button that is. ‘cept… there is always a ‘cept or “But” you know… always. For me and my WordPress it seemed to never work. On a rare occasion a plug-in would actually update when I pushed the button, but that was rare, very rare. So for several years I developed a routine.
A) Go to Admin panel
B) See there are updates available for a plug-in, (and yes back “in the day” you were not notified when there were updates, you just sort of checked frequently to see there there were any issued.)
C) click on the “Automatic Upgrade” button.
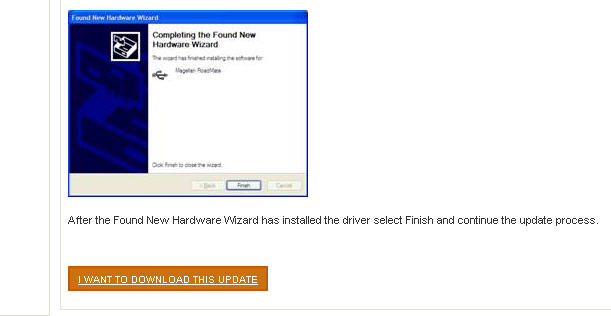
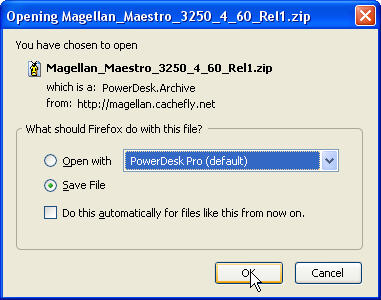
D) Watch the program automatically download the Zip file containing the upgrade
E) Watch as it quit doing anything useful and sit there until I lost patience and shut down the web page.
F) Go to the plug-in page on WordPress.org using the link in the blog plugin page.
G) Manually download the plug-in
H) Create a new directory on local drive
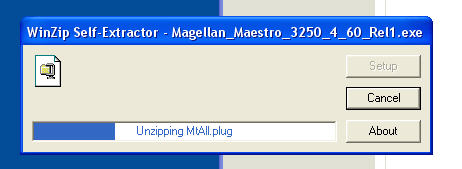
I) Unzip the plug-in to the new directory
J) Open an FTP session
K) Turn off the plug in in WordPress control panel
L) Delete the plug-in directory on the server
M) Copy the new plug-in directory to the server
N) Go back to the WordPress control panel and activate the plug-in
O) Hope it did not crash the system.
P) Repeat C through O for each of the new updates

This week I decided to take the risk and stress to update to the latest version of WordPress 3.0.1. So as always I clicked on the automatic upgrade button, and low and behold but what do you think happened? Of course, it crashed the system. Okay, reset everything, go through the manual install… following steps A through P above. The actual program update went pretty well, but then I got to the plugins and restarting them. Boom – the “500” error. Okay, deactivate all the plug-ins by renaming all of them. Now restart WordPress, now rename all the plug-ins back again. Now re-activate them one at a time until the “500” error comes back. Mark down that plug-in in, rename it, then go on to the next one…. one after the other after the other. VERY time consuming.

After I got everything working again, minus a few of the plug-ins that were causing the 500 error where the author has not updated the plug-in yet, I took a break from everything WordPress. Not upset, just “Head clearing time”.

As I did other things I thought, “I am not going to keep doing this for the next X number of years!”. So I started searching the WordPress forums for an answer. The first observation is that MANY people have this issue. So the automatic upgrading in not all that automatic for many people. The next observation is that the 1 & 1 hosting service seems to be a big offender. Now for observation one, I know from other issues most people write when they have a problem, not when things go right, so it always looks like everyone is having a problem.. same with computer or other hardware issues…. As for observation two, well 1 & 1 is a large hosting service so they probably do have a lot of people with the same issue. Also since it is large trying to get them to change something to make it work for a certain group of users (WordPress) may not be that easy so the people with problems just multiplies.

Then I started finding different “fixes” for the issue. From cross your fingers and pray, to “it isn’t hard to do a manual upgrade, so just do it”, to “I did a complete reinstall of WordPress and it .. nope, didn’t fix it!

Then I noticed a number of threads with the same basic fix, a few lines of code/text to put into the “.htaccess” file, which I also found out stands for “HyperTextAccess” a small routine which the host server reads when it looks at the directory which contains it. (or it could be in the root directory and pointing to the WordPress directory…)

There were actually a couple different entries suggested, but the one that seemed to help most people was a very simple two lines of text:

AddType x-mapp-php5 .php
AddHandler x-mapp-php5 .php

I decided it was worth a try, and really it can’t hurt since the .htaccess file can just be deleted if something goes wrong. (If you do this, you may want to save a copy of the original just to be safe.)
I opened up the .htaccess file in Notepad (or any ascii/text editor) and typed in those two little lines, copied the file back to the WordPress root directory and fired up the browser!

In the WP Control panel there were two themes which it was saying there were updates for. (A new feature in 3.01?) I had tried the automatic update before, and it did the usual “Downloading XXXX.zip” and then complete stop……………….
I went back to the same place and clicked on the update button… Well, what do you know… it downloaded those suckers in a few seconds, installed them and told me everything was okay in a matter of a few seconds! I went out to the web page and back to the control panel just to make sure I did not get a 500 error or “System in maintenance” error, and everything seems to now be working perfectly! Now I can hardly wait for a few plugin updates to come out so I can try it on them…. Maybe, just maybe even the full core code update will work next time!

Apparently the two lines of code above tell the server to use PHP version 5 which is what works with WordPress. I don’t know the technical detail even though I read about it on the web, and I don’t know that I care. I do know it seems to have fixed my problem and that is what I do care about.

Enjoy,
George

Solstice Run 2010 – Running without the horses…

The second annual (for me) Solstice Run in Northville Michigan has come and gone.
The Northville Solstice Run has several races, 5K, 10K, and new in 2010 a 10 Mile race. They all feature a starting lap around the Northville Downs horse race track. Giddy Up!

Victory at Northville Downs.

Photos were taken of the event by the faithful support team.

The official results for the race. Not what I would have hoped, or even expected, off from last year by several minutes. (2009 was 57:57)
Bringing Home the Roses.

There are trotters, pacers, thoroughbreds, quarter horses, plow horses and nags.
Guess it was the day for the plow horses….,

George

Uploading Custom POI files to a Garmin GPS Unit.

In the first part of this two part series I wrote about creating a new POI file using ITN Converter and saving it so you may upload it into your GPS unit.

So, are you ready to proceed?

If you did not install the Garmin POI loader software when you got your unit, go and download it, then install it on your PC.
https://www8.garmin.com/products/poiloader/

Use the link to download. This page also mentions “Proximity Alerts” which you will need to set later when you are uploading your files to the GPS unit.

Uploading a custom POI file to a Garmin.GPS.

Now that you have the “POI Loader” installed you are ready to go. Get your GPS unit, plug it into your computer using a USB cable. When it is attached turn the GPS on. After a short time the the Garmin screen should show something like the following picture.
Uploading a custom POI file to a Garmin.GPS.

Now open the Garmin POI Loader software using your new desktop icon.
Uploading a custom POI file to a Garmin.GPS.

The software should open up, read what it has to say and then click “Next”.
Uploading a custom POI file to a Garmin.GPS.

The next screen asks where you want to save your POI file to. Until you learn more about this, leave the default “Garmin Device” radio button selected. If is does not happen to be selected, do so, then click “Next”.
Uploading a custom POI file to a Garmin.GPS.

If you have the Garmin plugged in properly, and it is turned on, the program should automatically find your device. You can click on the button (15) but should not have to do so. Either way, make sure it shows in the window before you proceed. Once it does, click “Next” (17).
Uploading a custom POI file to a Garmin.GPS.

In the next window you can clear the old POI’s from the unit (perhaps you have some you no longer want. If you are just adding new POI files, or overwriting your existing ones, then just leave “Linstall new customer POI’s onto your device” radio button selected. Then click on “Next”.
Uploading a custom POI file to a Garmin.GPS.

The next window requires some minor decisions to be made by you. Where is/are the POI files located at on your system. You do remember where you saved them from the first post when we created them… browse to that folder. (18)
Uploading a custom POI file to a Garmin.GPS.

TIP: If you begin making multiple POI files create separate folders for the “Current” and “Old” files.

TIP: If you begin making multiple POI files, or editing them and like to save the old versions as I do, then create separate folders for the “Current” and “Old” files. When you start to upload you will find it makes things much easier to select the files you want to use.
Pick your units of measure that you use. (19) and finally select whether you want the software to automatically upload everything, or if you want to do it manually. Select “Manual”! (20) I am pretty sure you won’t like the defaults on the automatic setting. Finally, click on “Next”. (21)
Uploading a custom POI file to a Garmin.GPS.

Once you click “Next” it will start preparing the files to upload. For every file it finds in the directory you selected it will ask what you wish to do with that file. (22) (This is why only having the current files in the directory is handy, you don’t have to skip all the files you do not want loaded.)
You can “Ignore the file” and go to the next one in the directory you selected. You can decide if you want “proximity alerts” for the file or not. (23) Basically these notify you when you are in range of any of the specific points contained in the file you are opening at the time. The “Alert when speed is greater than the Alert Speed” setting could be used to warn you to slow down when you are nearing your intended destination so you do not go past it, or maybe if you have “speed traps” programmed in it will just pop up a warning when you are in the vicinity of the programed locations. In that case a red box pops up on the GPS warning you that you are exceeding the speed you have selected. I like the “Alert whenever you get close to a point, and go with the default quarter mile (1320 feet). You might also like a half mile or some other distance. If so just enter it here and make sure you select the associated radio button. Once you have made your choices, click on “Next”. (24)
Uploading a custom POI file to a Garmin.GPS.

Once you have selected and configured the final file in the directory the software automatically goes to work. It converts the files to the correct format and loads them all into the GPS unit. This only takes a few seconds normally. Unless maybe you have some extremely large files. I have a total of almost 15,000 points I load and it goes quite rapidly. Once the “Congratulations” screen pops up you are done! Click “Finish (25) and then detach your GPS from the USB cable and go for a drive!
Uploading a custom POI file to a Garmin.GPS.

Now that you have added all your favorite POI’s you need to know how to find them on the unit! Since I had been using a Magellan unit for some time prior to getting the Garmin it took a few tries to get to them the first time. Once you do it though it is easy enough in the future.
When the unit starts up, you get the main screen. Click on “Where To?”.
Uploading a custom POI file to a Garmin.GPS.

On the next screen go to “Extras”
Uploading a custom POI file to a Garmin.GPS.

On the next screen go to “Custom POI’s” (Go figure…)
Uploading a custom POI file to a Garmin.GPS.

Finally if you have multiple Custom POI’s you will be given a choice of them. Here is why adding the number to the beginning of the file name helps to put the frequently used files at the top of the list.
Uploading a custom POI file to a Garmin.GPS.

Now that you have the file loaded you can pick the location you want to navigate to from the list.
Uploading a custom POI file to a Garmin.GPS.

Verify this is the location you want to navigate to and hit “GO”!
Uploading a custom POI file to a Garmin.GPS.

And as soon as it calculates everything you are on your way!
Uploading a custom POI file to a<br /> Garmin.GPS.

Until the final way point is added,
George

Creating a Custom POI file for Garmin GPS

I travel quite a bit for work, and find using a GPS to get me to all the different places I need to go is almost a necessity. There are also vacations with many places that we have never been to before. The days of carrying state maps in the glove compartment (Dating myself – but can you remember when you could get all the maps you wanted free at any gas station?) or an atlas in the trunk are over for me. Even the “high tech” method of using a mapping program to find a location, develop the route to the destination and then printing a map out are past their prime.

To get around to all these places with the least fuss I create different custom POI files for the Garmin Nuvi 755T that I received as a present. I would imagine the method I am going to detail on creating and uploading a custom POI file would apply to other models also.

First you need five things:

  • A Garmin GPS
  • Garmin POI loader software
  • A USB cable
  • ITN Converter software
  • An internet connection to download and use the ITN software.

First download the ITN software from https://benichougps.blogspot.com/
(Note: Clicking on any of the following pictures will enlarge (most of) them to allow you to see detail better.

Creating a custom POI file for a Garmin.GPS.

You may do better if you convert the page to English, although it is not really necessary.
Creating a custom POI file for a Garmin.GPS.

Click on the “Downloads” hyperlink.
Creating a custom POI file for a Garmin.GPS.

Follow the prompts to install the software to your PC. Once done you will have an icon like the following on your desktop.
Creating a custom POI file for a Garmin.GPS.

Once it is installed click on the icon to open the software. Then click on the “Editor” button in the lower right hand side.
Creating a custom POI file for a Garmin.GPS.

It will launch the program and open a link which displays Google Maps in a pane along with the program.
Creating a custom POI file for a Garmin.GPS.

Now the fun part starts! Where do you want to go?

Now the fun part starts! Where do you want to go? Type in a search string that gives you the results you want. (1) It can be an address or the name of a place. Here I wanted to find “Cobo Hall” in downtown Detroit Michigan since I was going to run a 10K “Turkey Trot” race there. Click the “Search Icon” (2). Now you have to pick the best match for where you want to go. I like to turn on the satellite view, (4) and zoom in so I can see the object fairly well. (5)

Creating a custom POI file for a Garmin.GPS. It may take a littel sleuthing to make sure you have the correct location. You can use the address that comes up and Google it to verify the address is the place you want. I often go to the Google Maps page and search there since it gives more detail on the place located. Once you are sure you have the correct location showing you can edit the name. (6) This name will later show in your GPS so you want it short and meaningful to you. Once you edit the name click on “OK”, then remember to click on “Add to itinerary” to save it to your list. (8)

TIP: You can click on the map to add a “pin” for the exact location you want.

TIP: You can click on the map to add a “pin” for the exact location you want. I like to do this so I can define a specific place I want to go such as a certain parking lot at a large park, or even the entrance or exit of a large building that I want to be closest to. Just add the pin then name it like above.

You should see it appear in your list of saved places (9)
In the file give your new file a name. (10) This name will later show in your GPS as the “Custom POI” file name. Again, you will want to give it a meaningful name.
Creating a custom POI file for a Garmin.GPS.

TIP:Organize your files!

TIP: I start all my file names with a series of numbers like 01, 02, 03, etc. This is because later the GPS will order the custom POI files in your GPS in this same order. I like to put the most commonly used ones first in the list to avoid a little bit of scrolling. You can always change the numbers later to add a file or rearrange them if you like.
Creating a custom POI file for a Garmin.GPS.

Repeat the above steps until you have as many waypoints as you want in your file. You can always come back and add more later if you want.
Once you have added all the points you want in this file, click on the X to close the editor.
Creating a custom POI file for a Garmin.GPS.

Once you close the editor it will automatically add the new locations to the file page.
Creating a custom POI file for a Garmin.GPS.
Now you are ready to save your file for later use. At the bottom of the window select “CVS” as a file type. (12) Then click on “Export”. (13)

When you click on export a file explorer opens, pick where you want to save your file, and the name you want it saved by. It will use the name you entered earlier by default but you can change it here if you like. Here I have added the “16” to the file name for later ordering of the files. Another tip is to use either the number of places contained in the file, or the date… or both as shown here. The number of entries in the file lets me know which “revision” it is if I edit the same file multiple times in a day.

That’s all there is to creating your first custom POI file! The ITN software makes this so easy to do I frequently go back in an add even one or two points to a given file. It’s easier than typing in an address in the GPS unit, and probably more accurate.

Now that you have a file what do you do with it? Come back in a week when I go through the details of how to best load the new custom POI’s into your unit.

Until the final POI is defined,
George

Upgrade your Magellan Maestro 3250 GPS Firmware, a How-To.

Upgrading a Magellan Maestro GPS Firmware – Install Firmware

Before you attempt this step you should have completed the directions in the prior post to download the latest firmware for your unit off the Magellan web site.

Magellan Maestro 3250 GPS Unit

When you completed the final step in obtaining the firmware upgrade (shown above) it was saved to your PC hard drive…. you remembered where…. didn’t you?

My Firefox download manager is set up to save downloads to the desktop where I can see them easily.

Magellan Maestro 3250 GPS Unit

After it completes the download, you should have the file… here is the icon on my workspace/desktop.

Magellan Maestro 3250 GPS Unit

You may want to create a directory to put the extracted files, so create it first, but since there are only two files, if you want to extract them directly to the desktop it isn’t a big deal. You can just delete the later, or save them to another place, but I doubt if you would ever need them again.

It is a self extracting .Zip file, so if you “double click” on the icon, it should begin the extraction process.

Magellan Maestro 3250 GPS Unit

Once it unzips it will start the install process.

Do NOT have your unit plugged into the USB cable at this time! I think if you do, not only will it trash your GPS, it will reformat your hard drive.

Do NOT have your unit plugged into the USB cable at this time! I think if you do, not only will it trash your GPS, it will reformat your hard drive. Set your VCR time ahead two hours, turn the temperature up in your refrigerator so your beer is warm, it will also cause gas prices to go above $5 a gallon and melt the polar ice cap…. and you do NOT want to be responsible for all that! Leave the GPS unplugged!! Until it says to plug it in.

The defaults should be okay to leave as they are, so just click on “Next”.

Magellan Maestro 3250 GPS Unit

Magellan Maestro 3250 GPS Unit

When you get this screen it is okay to plug in!

Read carefully and take heed.

  • Make sure the unit is fully charged
  • Make sure it is turned on, and all the screens have opened so you are at a “street View.

Then, and only then, click on the Next Button.

Continue reading