I have been playing around with some software (Dashware) that allows me to add various flight parameters to videos shot with the DJI Mini2. It is a little tricky to get everything set up right, but there are number of good videos on YouTube that show how to do this.
I need to get some footage now of some “stunt” flying.. as if I do stunts, but at least something to make the gages move off the needle!
Maybe duct tape it to the roof of the car and head around some back roads.
Mostly just for fun though. Don’t know why the route (in blue) got cut off. You have to fiddle around with it to get the start and stop points correct, and it seems like once you go to far, it removes the track, and then even if you back up it remains missing. I got tired of reimporting the data and left it this way. Guess that is why some tips are to start filming right away, then cut out the start and finish you don’t want. Maybe try that sometime.
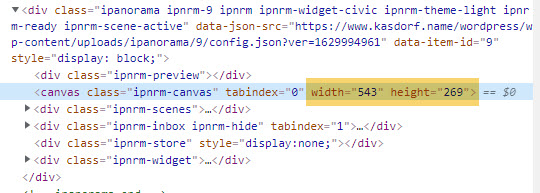
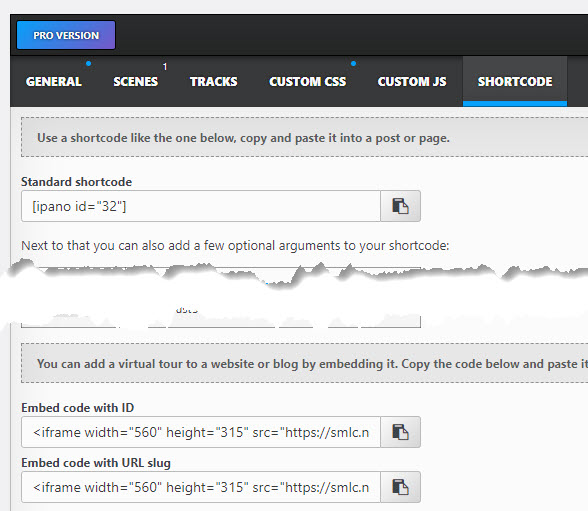
In a prior post I went through changing the size the 360 is displayed using the “Embed code with ID” settings. Some people may find it easier to use the “General” settings in iPanorama to set the desired size of the displayed image. Just insert the “Standard shortcode” and you are done.
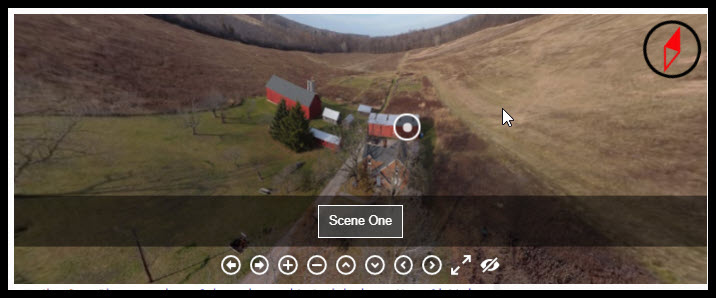
Leaving all settings at their defaults, and using the “Standard Shortcode” I get the following for my #9 iPanorama tour.
So, it appears that the “default” ends ups 543×269… why, I have no clue.
Note: You MUST add the units, in this case it is pixels, so make sure you put “px” after the number!! Or you will get really frustrated trying to figure out why it isn’t working!
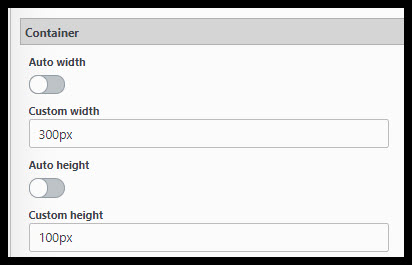
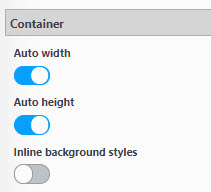
Now, to experiment, in “General” settings, “Container”, Turn off Container “Auto width” and “Auto height”, then set them to another value. I used 300px by 100px here.
Not so useful at this size! Unless you just wanted people to see the controls!
The actual image comes out at 269×89, maybe to preserve aspect ratios? Allow room for borders? Maybe padding? Again, I don’t know, but it does change the displayed image size. You can tweak the sizes to get closer to the actual display size you want.
Changing the Container size, but only using the Width setting while leaving the height set to “Auto”.
Again, we can see it has changed size, to match the width entered into the Container settings. Not sure where the height comes from!
This is mostly to show that in fact these settings work, and how to make basic changes to them.
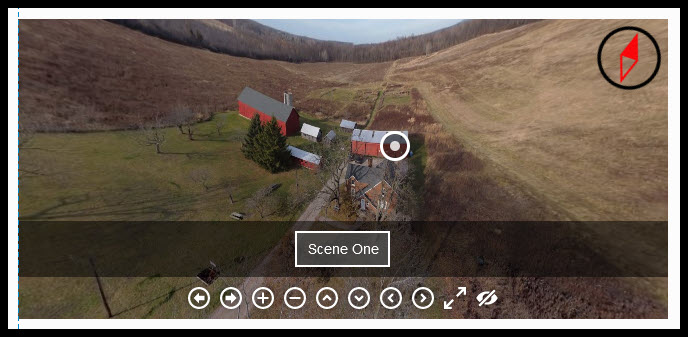
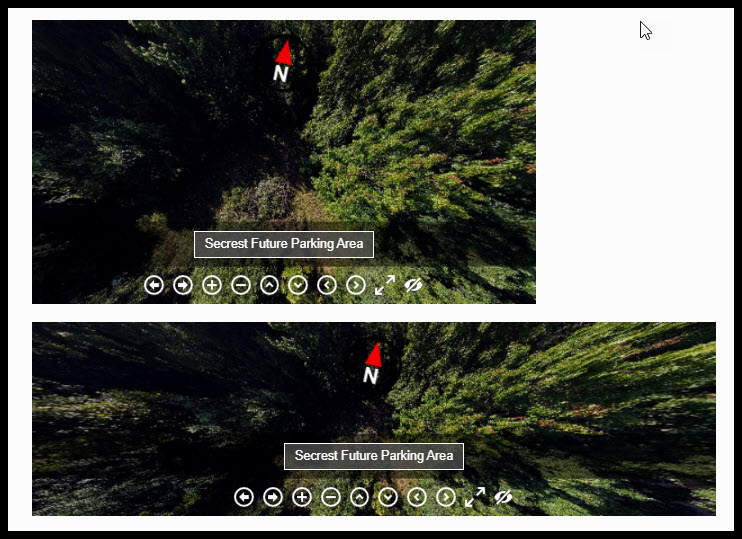
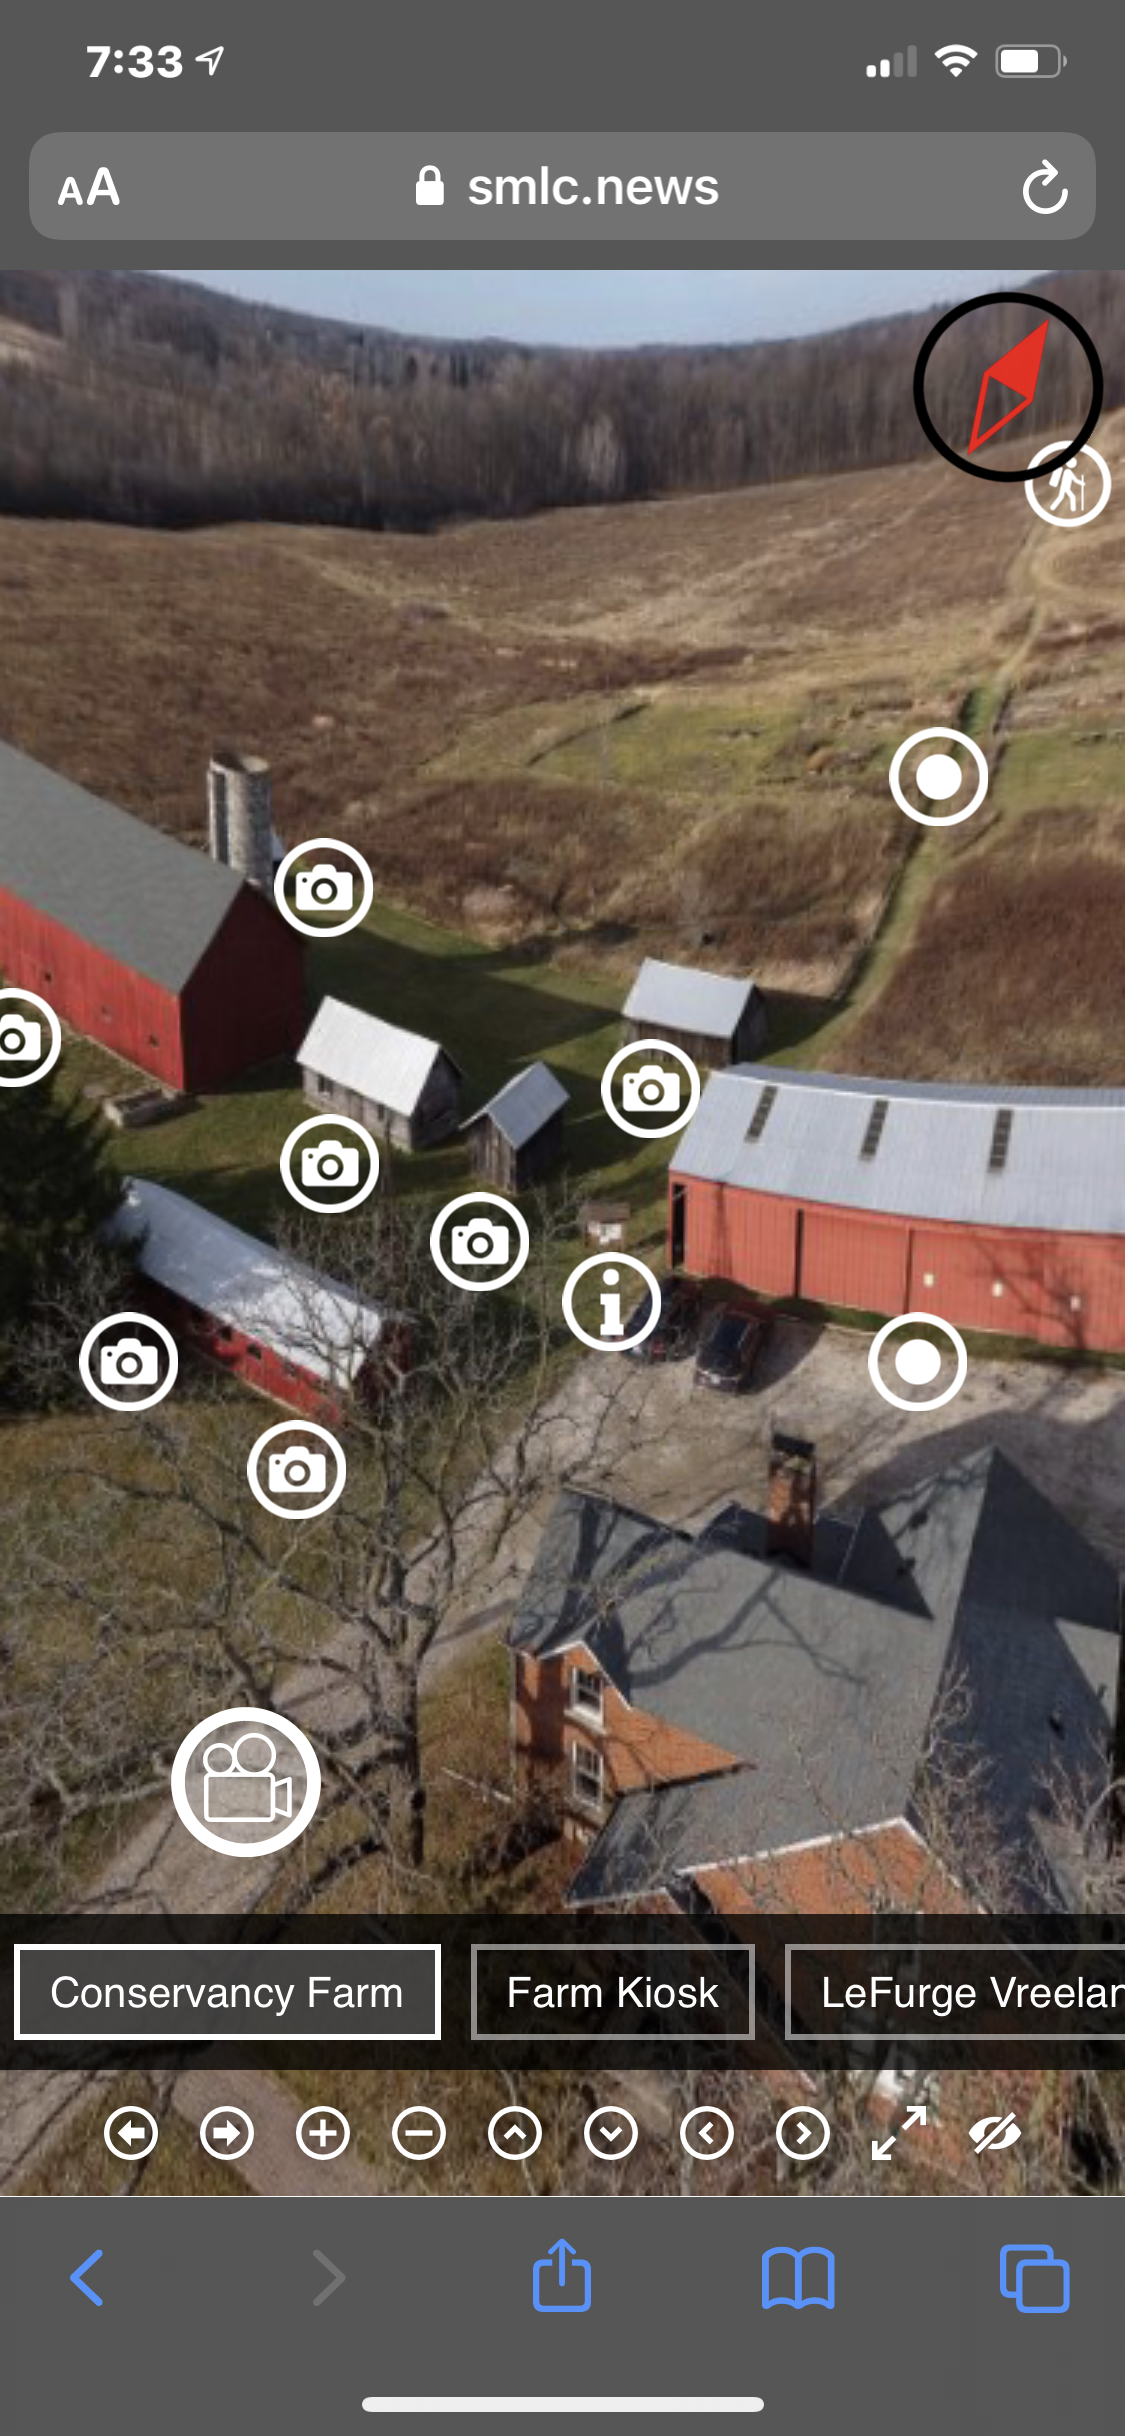
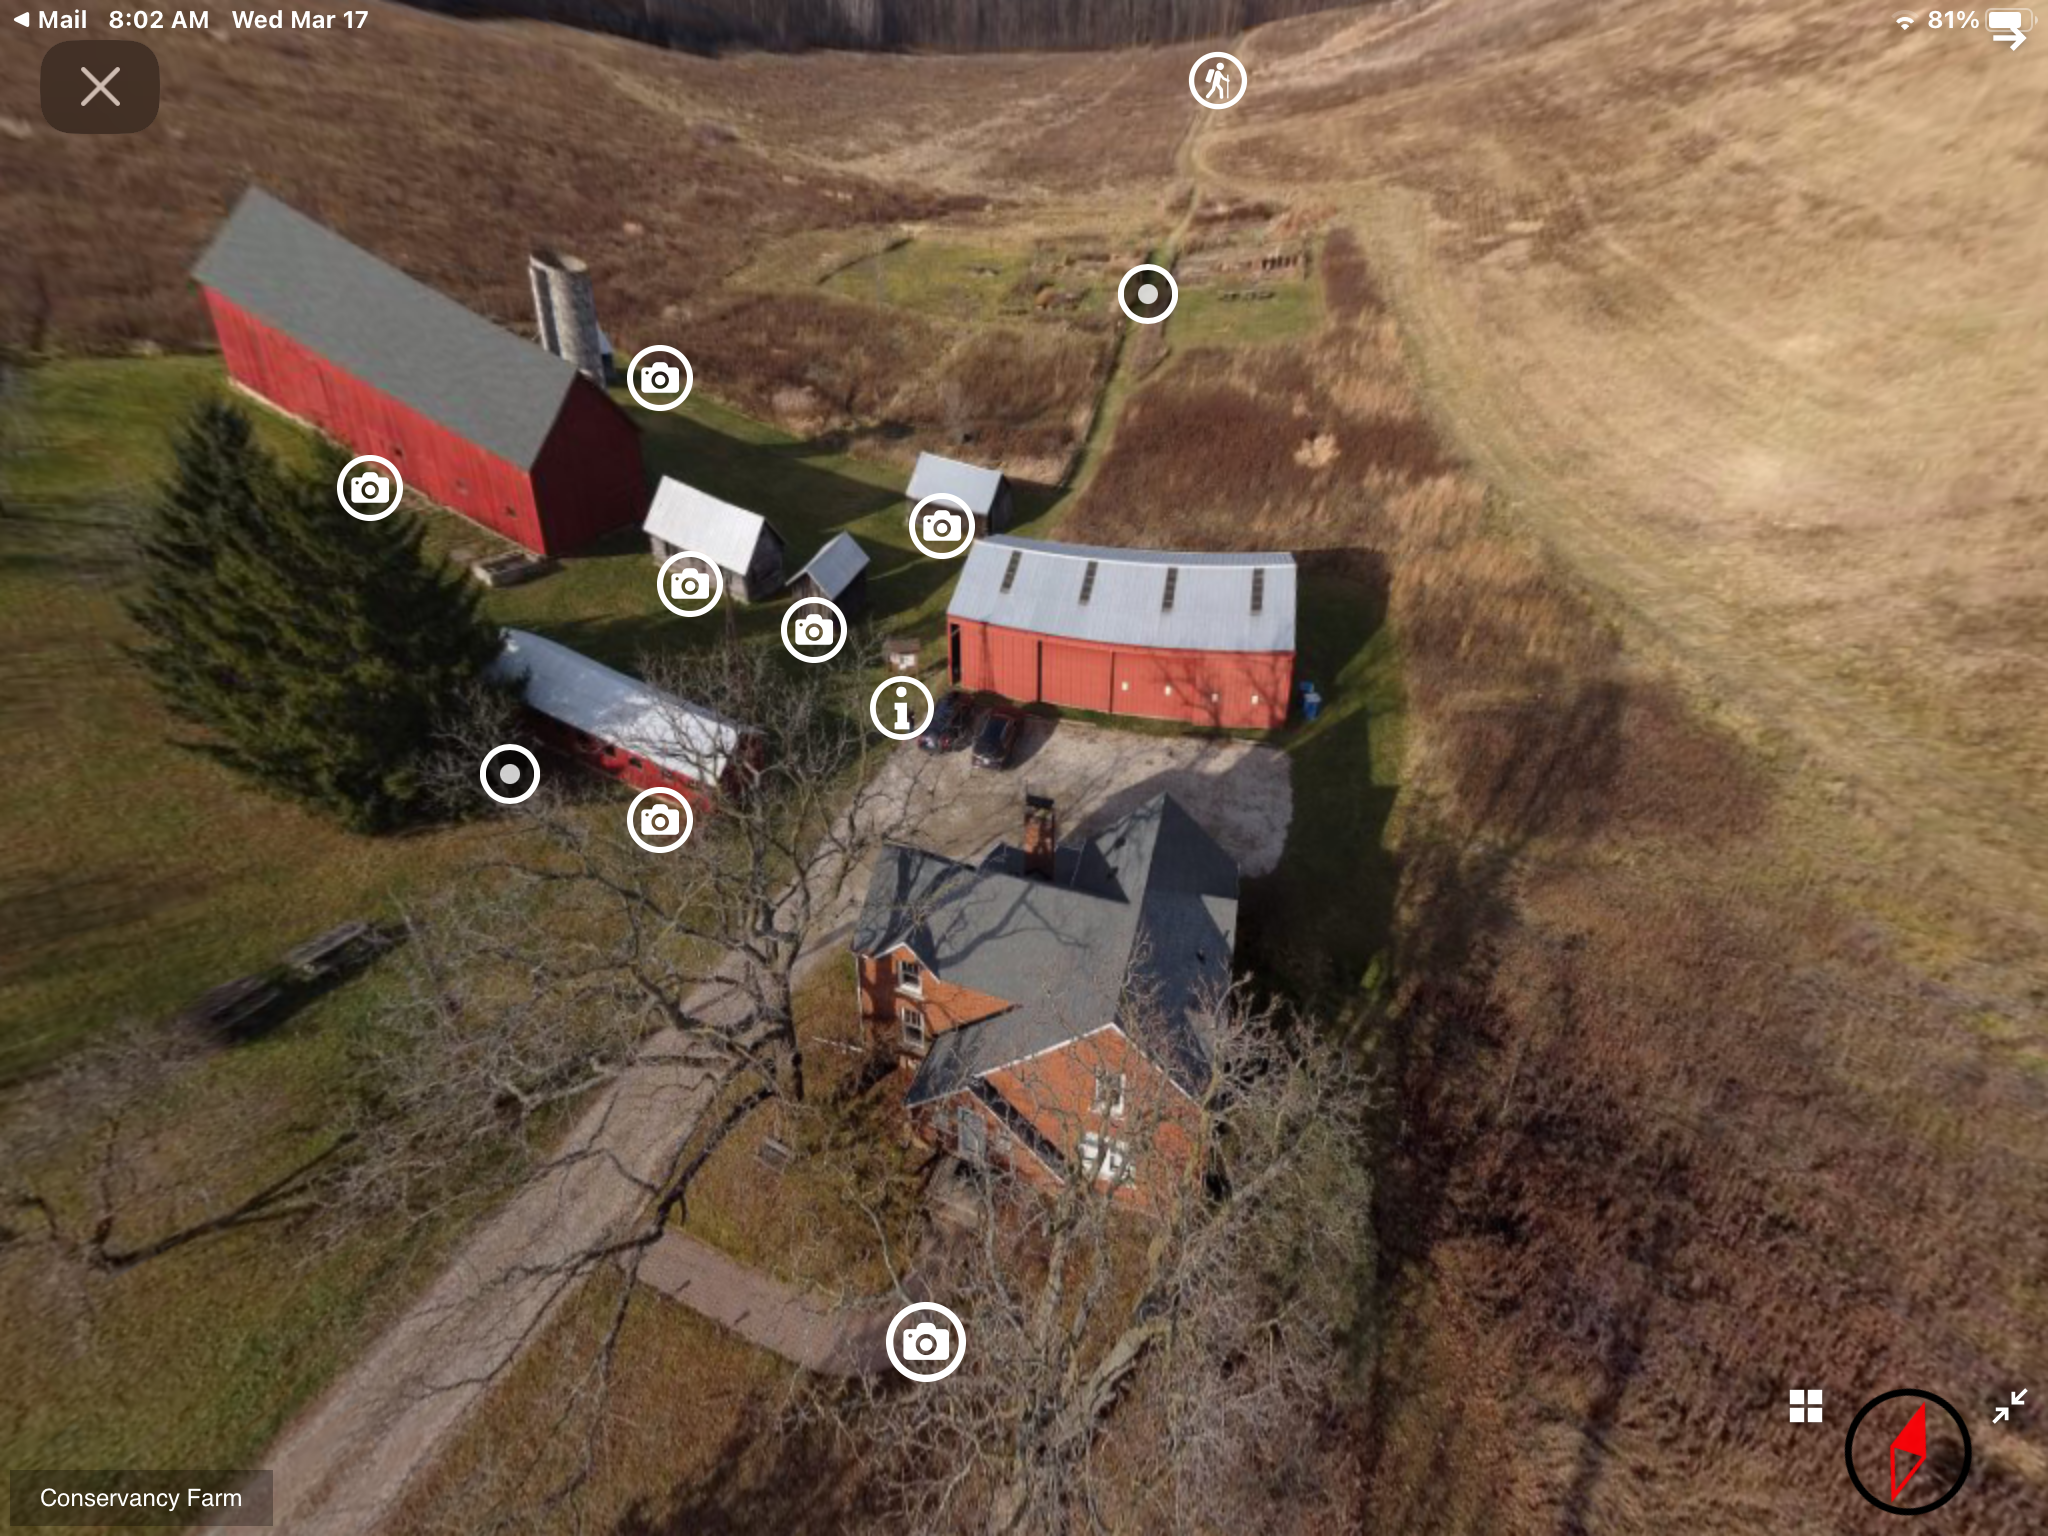
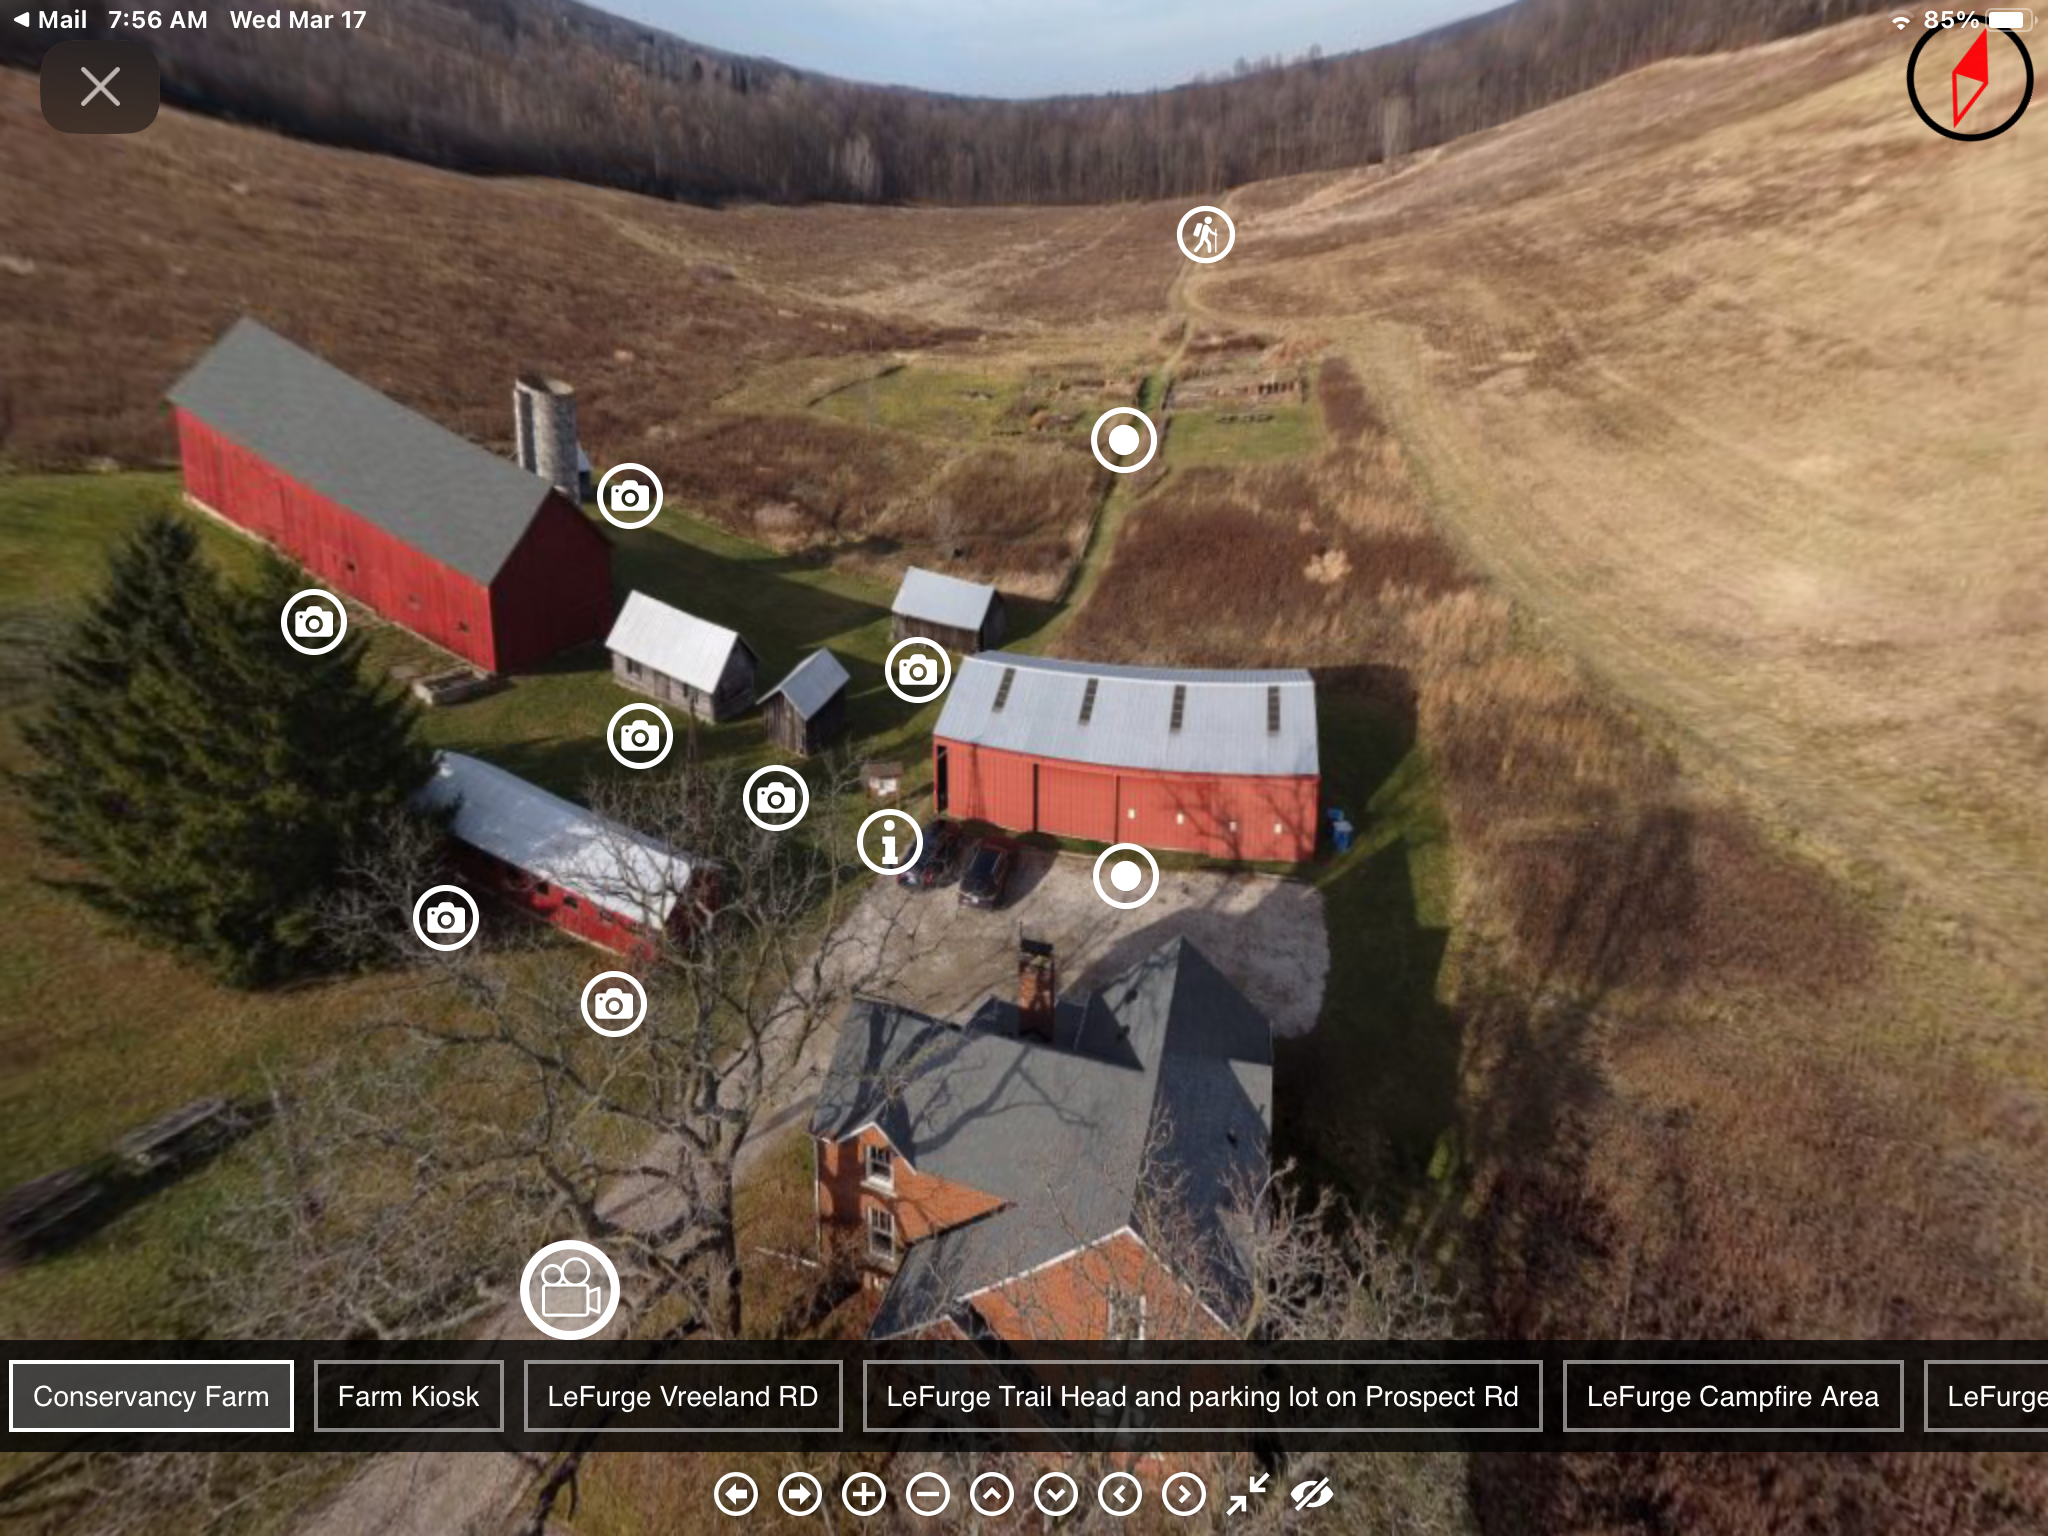
Still playing around with the iPanorama plugin for Word Press. When reading about the features on the web site I noticed it said there was a compass to help keep you headed in the right direction!Since I do mostly 360°’s of nature preserves and trails, I thought a compass would be nice. I never could find out how to make it work, and so wrote in the support forum to see what was the secret!
Turns out, it was turned on in the program, one of those many little things that get missed during a major update. No problem, the author soon restored it, and I was off to the races!
It was nice, but I thought it lacking, at least for what I wanted.
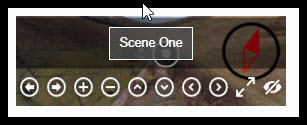
Figure 1: The default compass
As you can see, it was quite small, and being black and white was not easily noticeable. While some people may like the fact that it is unobtrusive, it wasn’t for me.
I wrote the plugin author and asked about if, and how it could be changed. He replied promptly that yes it could be easily done in the “Custom CSS” section. Unfortunately as much as I wish I was able to program, I can’t.
He was very accommodating and sent me some sample code. I tried it, and it works so good! And while I can’t write original code, I can often hack up what is there to tweak it to my tastes.
So, if you have an interest, and want to add, or change the compass. Here are my hopefully simple directions.
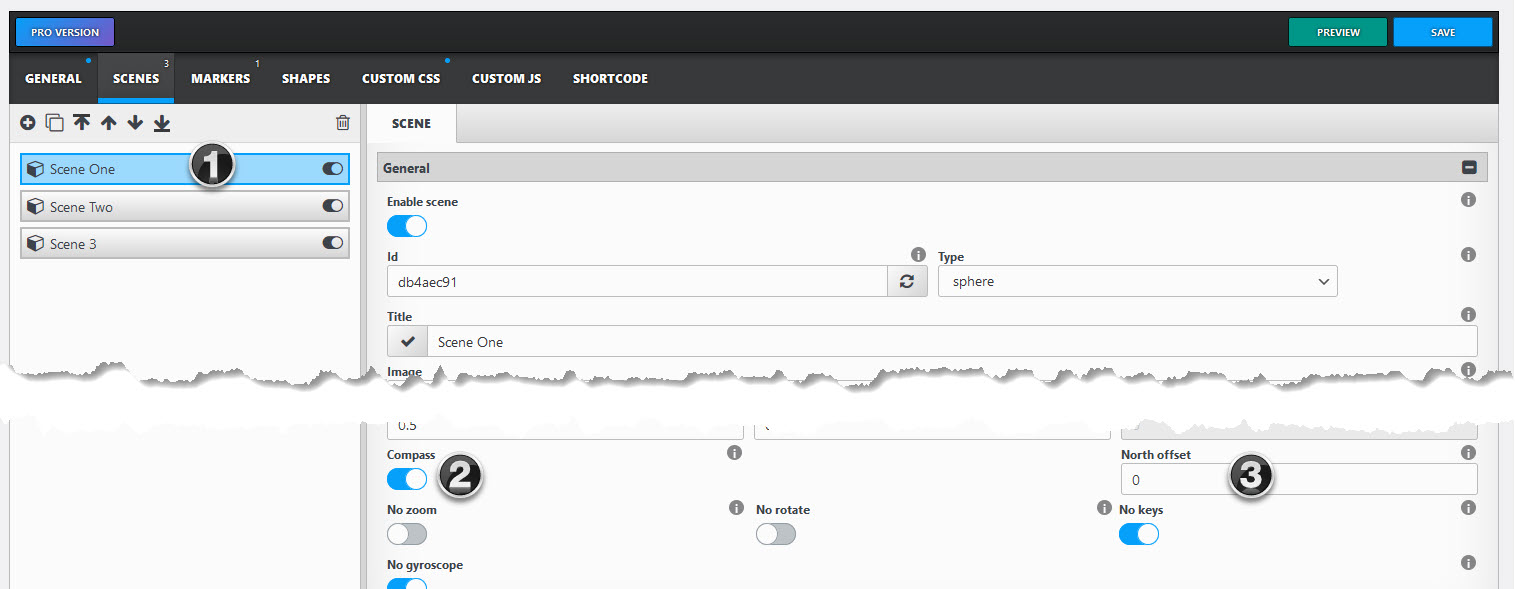
Figure 2: iPanorama Compass activation and offset.
(1) In the scene you want a compass to appear in first make sure it is enabled.
(2) In the settings, turn the “Compass” slider on.
Note that you must do this for each scene in which you want the compass to appear.
(3) There is a field for “North offset”. Nothing to do now, but you may want to come back here later. If your compass does not point north correctly change the degree offset here.
Tip: clicking on the compass points it due North. If the image is not showing North at the top rotate the image so North is “Up” then note the current angle and estimate the degree change needed.
Save the tour, then if you use the preview button you should see the default small arrow. Where it appears depends on the widget (Theme) you are using. It should look like Figure 1 above.
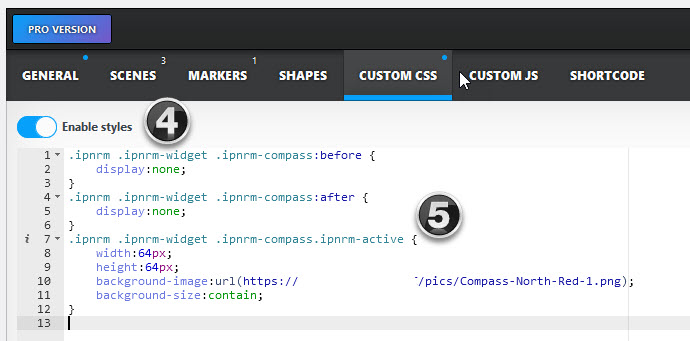
But you don’t want that plain old compass do you! First you need a good compass image. Then to change the default to your custom image, copy this code into the “Custom CSS” window:
Figure 3: Custom CSS code
(4) Make sure you enable styles!
(5) enter or paste the code and modify the URL for your compass image.
======
This is new text I added using p1 Times New Roman.
====
This is new text I added using p2 Courier New.
====
This is new text I added using p3 Lucida Console.
====
This is new text I added using p4 Tahoma.
====
h I Non specified font.
h II Non specified font.
h III Non specified font.
This is new text I added using p (only).
This is new text I added using pV Beyno. él? tippmix eredmények
====
THIS IS Beyno. This doesn’t work.
THIS IS LOGGER. color:#805a46
THIS IS LOGGER. color:#d2691e
THIS IS LOGGER. color:#35281E
THIS IS LOGGER. Best color:#7b3f00
FASTER ONE THIS DOESN’T WORK
This is Caveat! This Works!
=====
This is new text I added inside a plain div statement. But it seems no div is required.